

Have you attempted to print shipping labels for your WooCommerce shop, but you don’t know how to go about it? If yes, you’ve come to the right spot. We’ll go through step-by-step methods for setting up and printing a shipping label in WooCommerce in this post.
What is Shipping Label?
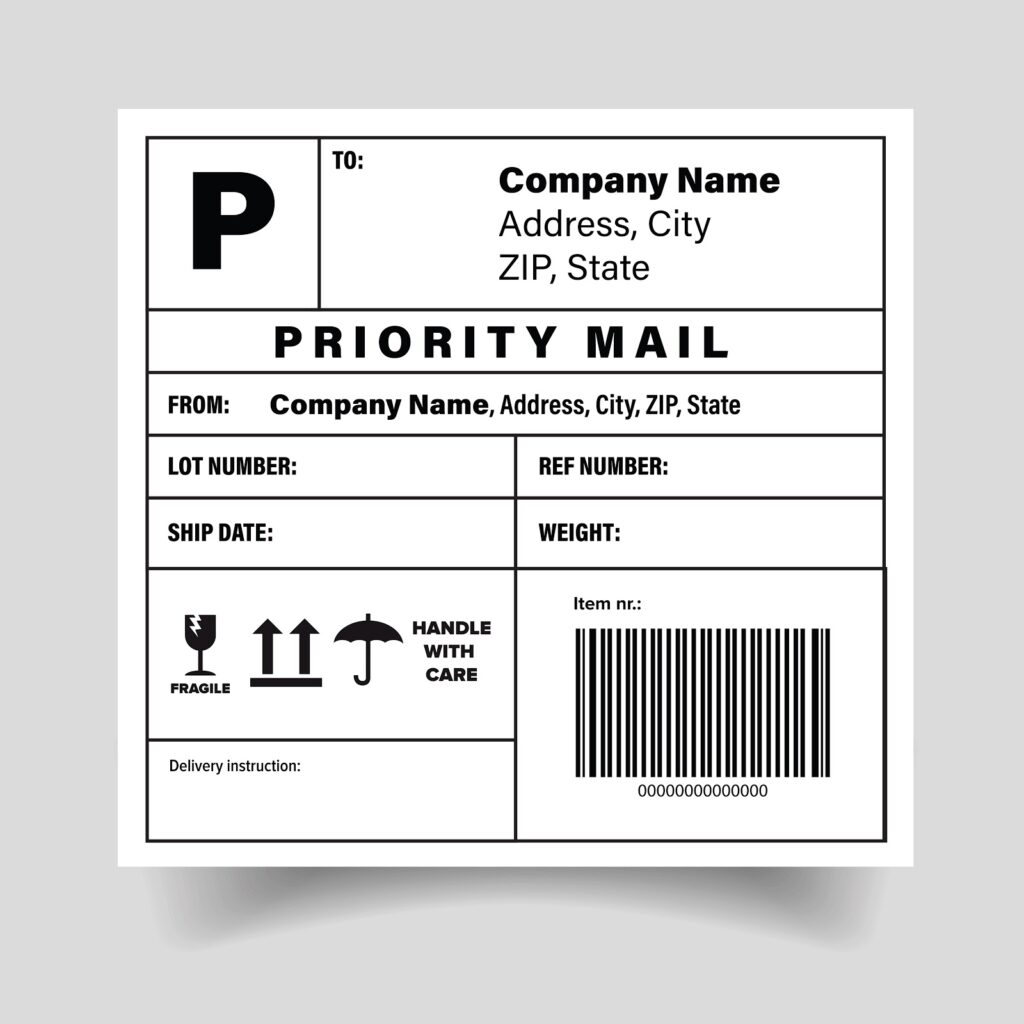
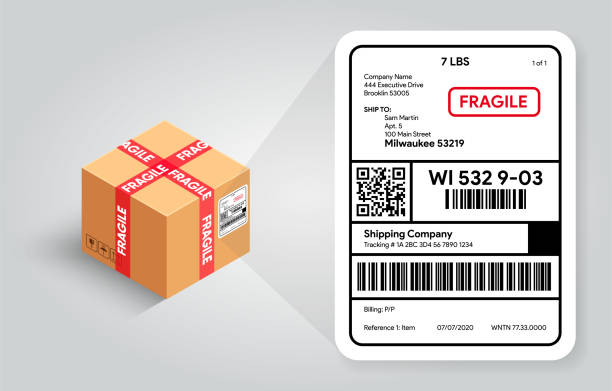
A shipping label is a sort of identifying label that assists in the description and classification of the contents of a package or shipment. More importantly, goods delivery will not take place until a shipping label is attached to the item. It comprises information about the shipping package’s destination and source for each node in the distribution chain to recognize, such as addresses, names, weights, and tracking codes.
Although shipping labels may appear to be a minor component of the eCommerce domino, they are crucial to both inbound and outbound logistical issues, as well as the effectiveness, visibility, and customer experience of your online business.
The Importance of WooCommerce Shipping Labels for eCommerce
All of the information required to deliver a product is contained on shipping labels.
WooCommerce shipping labels contain all the relevant information about the shipment to assure it arrives at the appropriate address and can be traced in real-time on its route there. It may contain details including such:
- Name and address of the recipient
- Address of Origin/Return
- Shipping mode (Priority Mail/Next Day Air/First Overnight)
- A barcode may be scanned to provide details about the sender, recipient, object, and so on.
- A tracking number that allows the shipment to be tracked online.
- Package weight
A shipment may be postponed in transit, transferred to the incorrect address, or lost if it lacks a visible shipping label. Late delivery may cost your company money – After failing to get their product within the expected time, 13% of customers said they would not purchase from the shop owner again.
You can offer all the details that the delivery carrier/Post Office and clients require by utilizing WooCommerce shipping labels. It is critical not only to have a process in place to generate these labels, but also to guarantee that they include comprehensive and correct information.
Shipping labels are required by all transport companies.
Shipping labels are requested by commercial shipping providers such as USPS, DHL, FedEx, and Canada Post to keep items moving via their respective networks to their desired destination. In the situation of international shipment, shipping labels assist in the easy transit of goods through customs. If you’re delivering a delicate shipment to a client in another nation, writing ‘Special Handling – Fragile’ on the shipping label alerts carriers that the package must be handled with extreme caution. Apart from increased extra padding and other precautions, this reduces the possibility of damage to the product and a customer complaint.
Tracking numbers enable both parties to track the progress of products.
A tracking number is a unique identifying number or barcode that is assigned to a product or shipment. On WooCommerce shipping labels, it is often presented as barcodes. The barcode is identified at each stage of the process, from drop-off/pick-up via transportation. The code is checked at each stage, and the position of the shipment is recorded.
Clients are provided tracking details on the digital receipt that they receive the following purchase, as well as via text messaging or emails. They may follow packages at any moment by using the tracking number. Shipment tracking codes are extremely helpful in determining the whereabouts of time-sensitive shipments.
How to Set up and Print Shipping Labels?
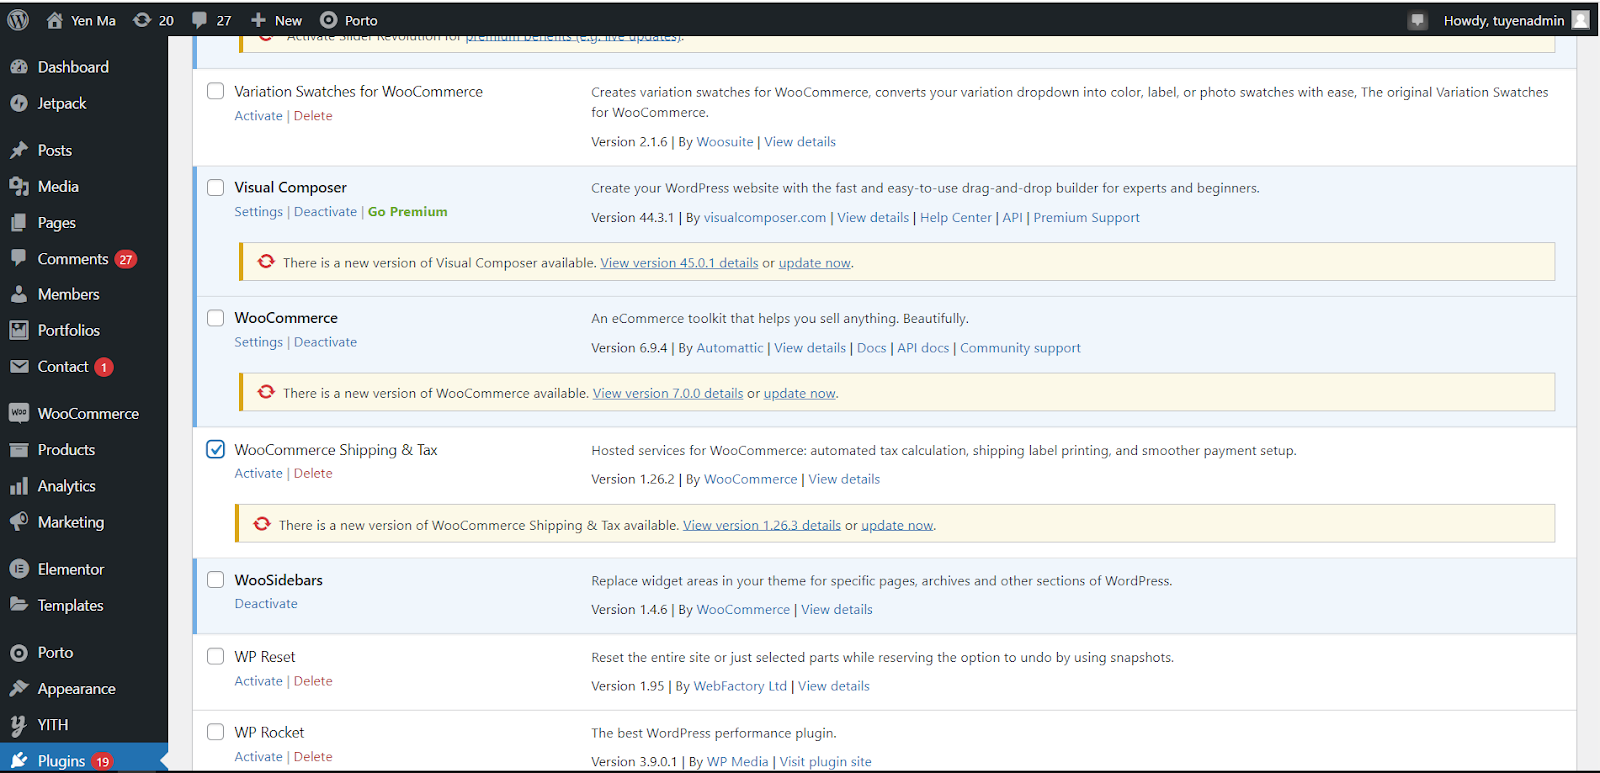
Step 1: Install WooCommerce Shipping and Tax
To generate the WooCommerce Shipping Labels, you need to log in to your WooCommerce account. On the right side of the screen, click Plugins, then find WooCommerce Shipping and Tax to activate it.
Step 2: Edit Shipping Labels
After successfully activating WooCommerce Shipping & Tax, you have to turn back to the dashboard, and press WooCommerce > Settings > Shipping > WooCommerce Shipping & Tax > Shipping Labels. Select the paper size for the label by clicking the drop-down menu after turning on the Shipping Labels button. When you see add a credit card after that, choose it to add your card.
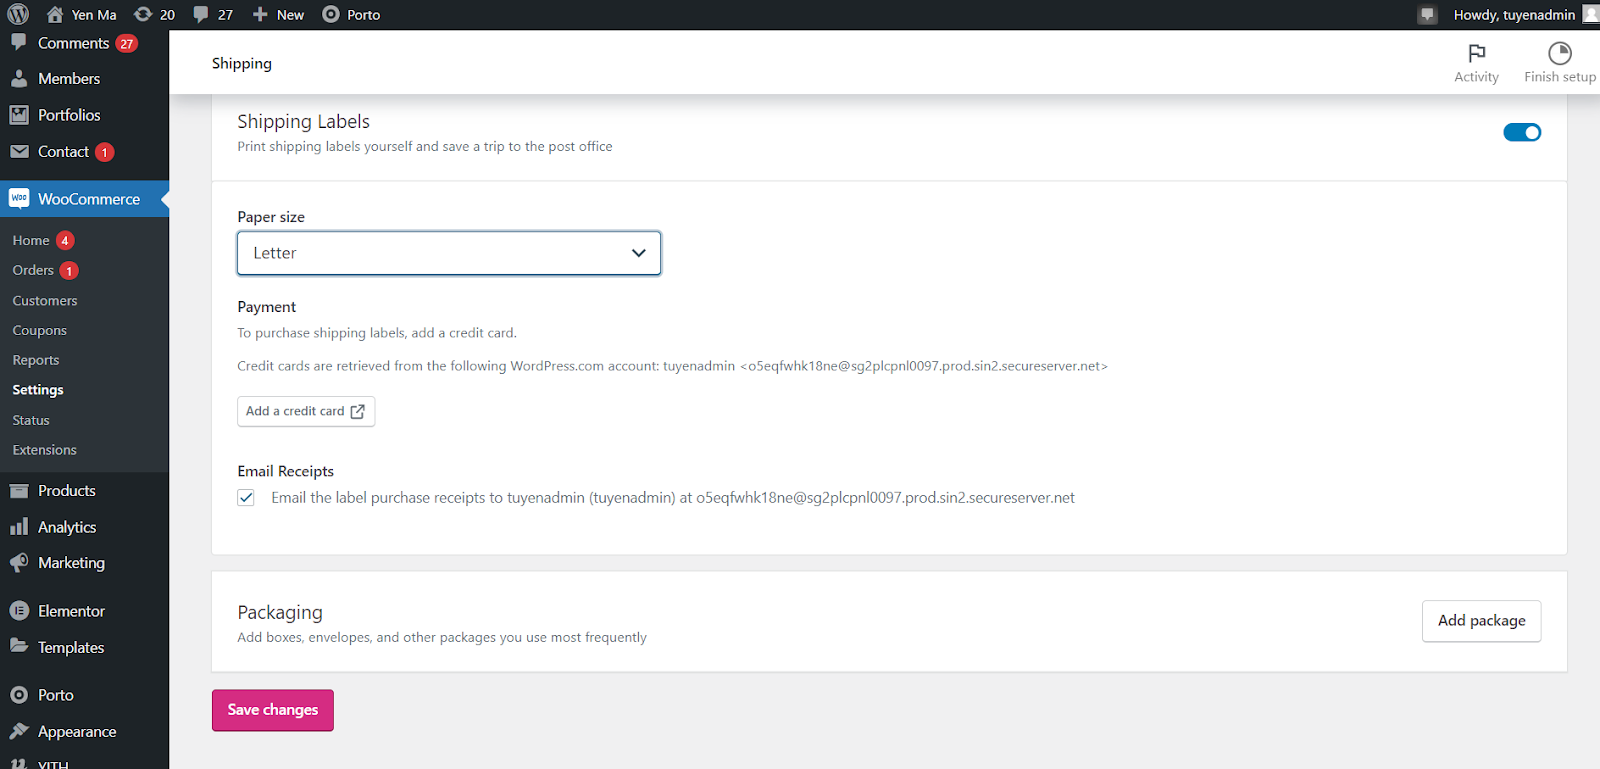
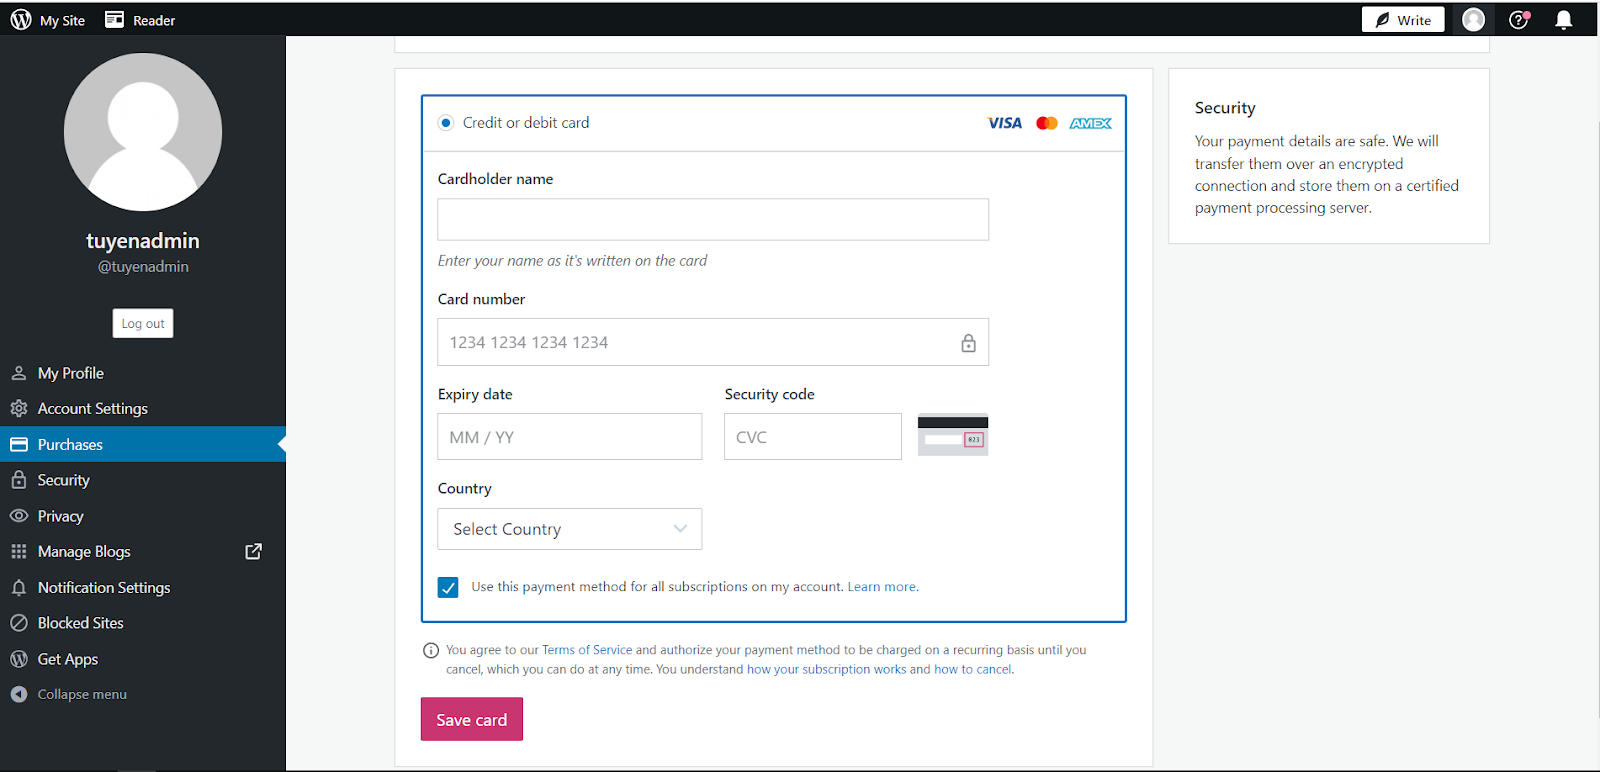
Step 3: Add your credit card
In this step, you simply fill in the information to generate the credit card. Finally, click Save card to complete this task.
Step 4: Select orders that need to print labels
You need to go to WooCommerce, then click select Orders, and choose the order that you want to print a shipping label.
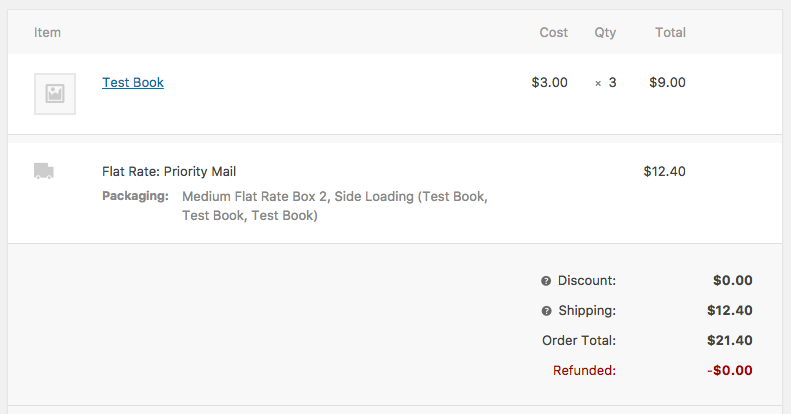
Most WooCommerce shipping method plugins display the customer’s selected pricing and packaging information underneath the purchase details:
Step 5: Create shipping label
Afterward, you have to click on the button Create shipping label.

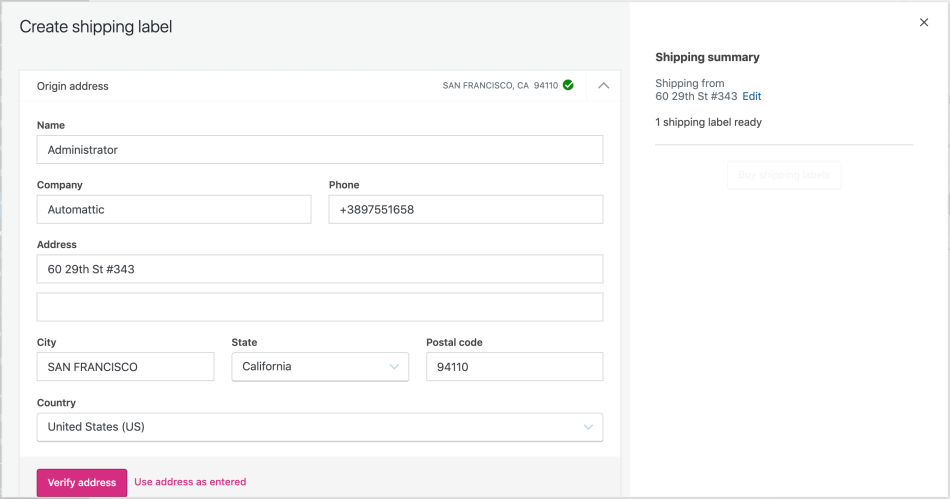
Step 6: Fill details for the shipping label
If this is your first time generating WooCommerce shipping labels, you should enter the full address from which you’re sending it. This could be a physical location or a post office box.
Please bear in mind that PO boxes are normally only permitted by postal services (like USPS) instead of by carriers (such as DHL Express). When printing a label, if the origination or destination address is a P.O. box, those providers will be inaccessible. When utilizing a PO box, returning it to the recipient is generally difficult.
You must then verify the source and destination addresses. Then once, click the Verify address option.
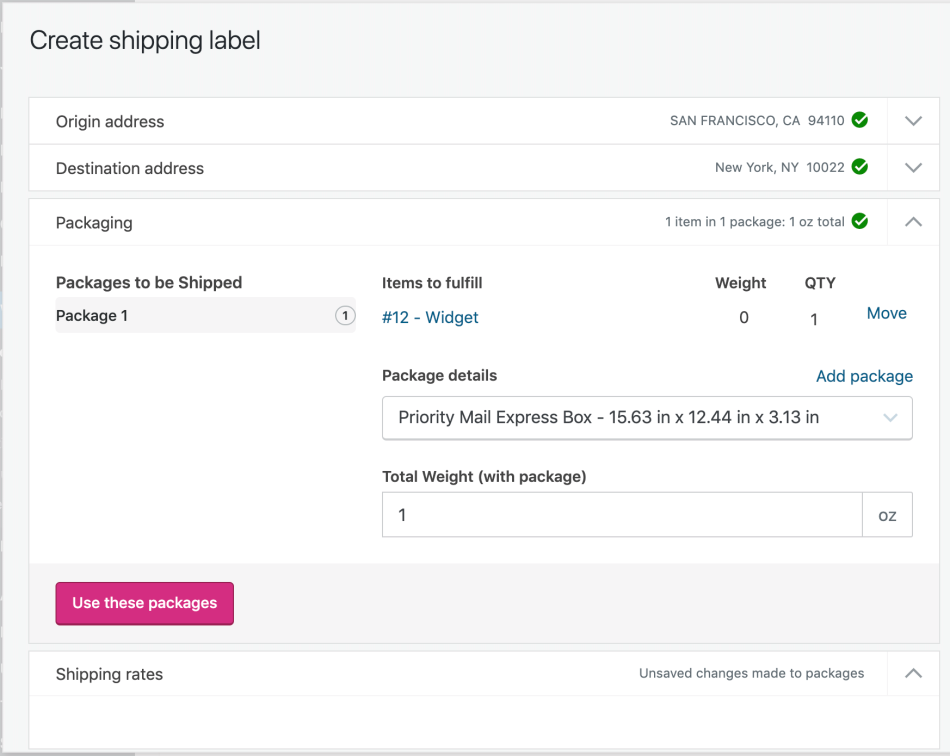
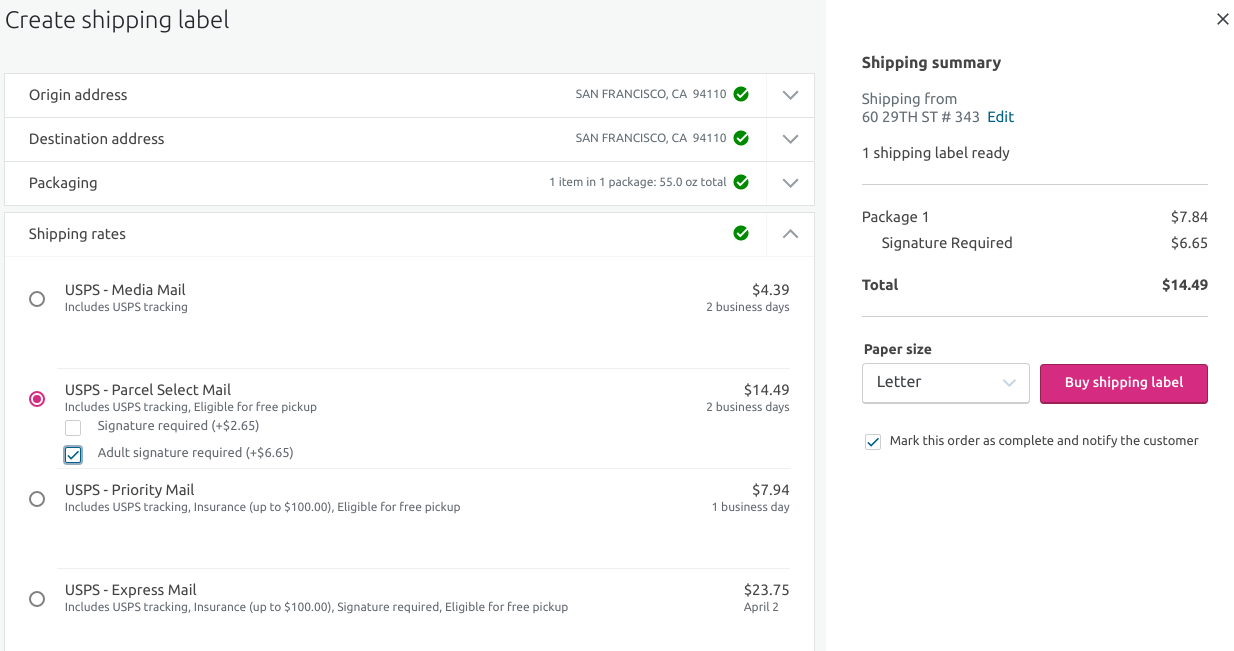
Step 7: Confirm the Package details
You must confirm the package details here. By selecting the dropdown menu, you can see the comprehensive packing.
Please click on “Use these packages” if all the information is accurate.
Step 8: Select the shipping rate
It’s time to select the shipping charge from the numerous options, and you can also specify if an official signature is necessary.
Step 9: Buy shipping labels
Since you have a payment mode on file with WooCommerce or have recently registered a credit card during the prior setup procedure, you will only need to press the Buy shipping label option to proceed to the next stage.
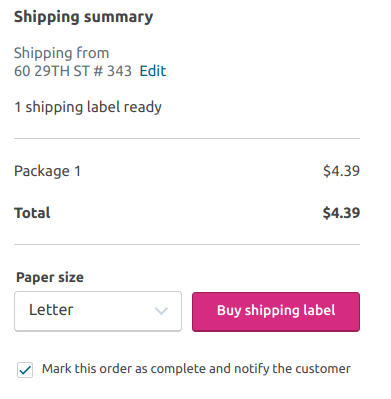
Step 10: Overview the shipping label
When you pick Buy shipping labels, a display will appear, and you will be able to check out the shipping label in Print form.
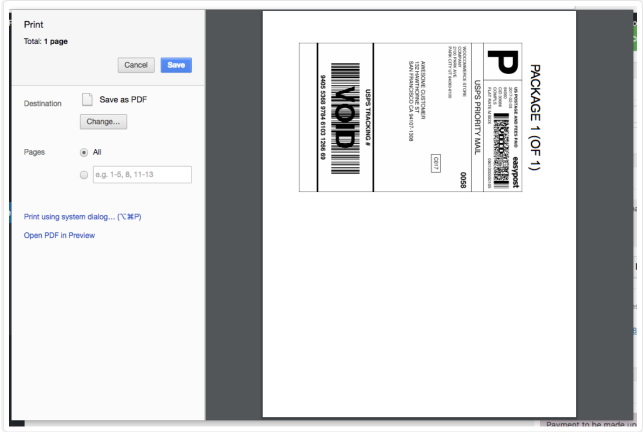
Step 11: Print the shipping label
To begin printing right away, click Print. Alternatively, you may continue placing orders while clicking Save to save the label, and then print all of your orders at once.
Just a little reminder: once you’ve selected the box size, there will be an extra step if you’re delivering an overseas delivery.
You will be required to provide the relevant information on each product you are transporting, which could include the HS Tariff codes if a customs form is required:
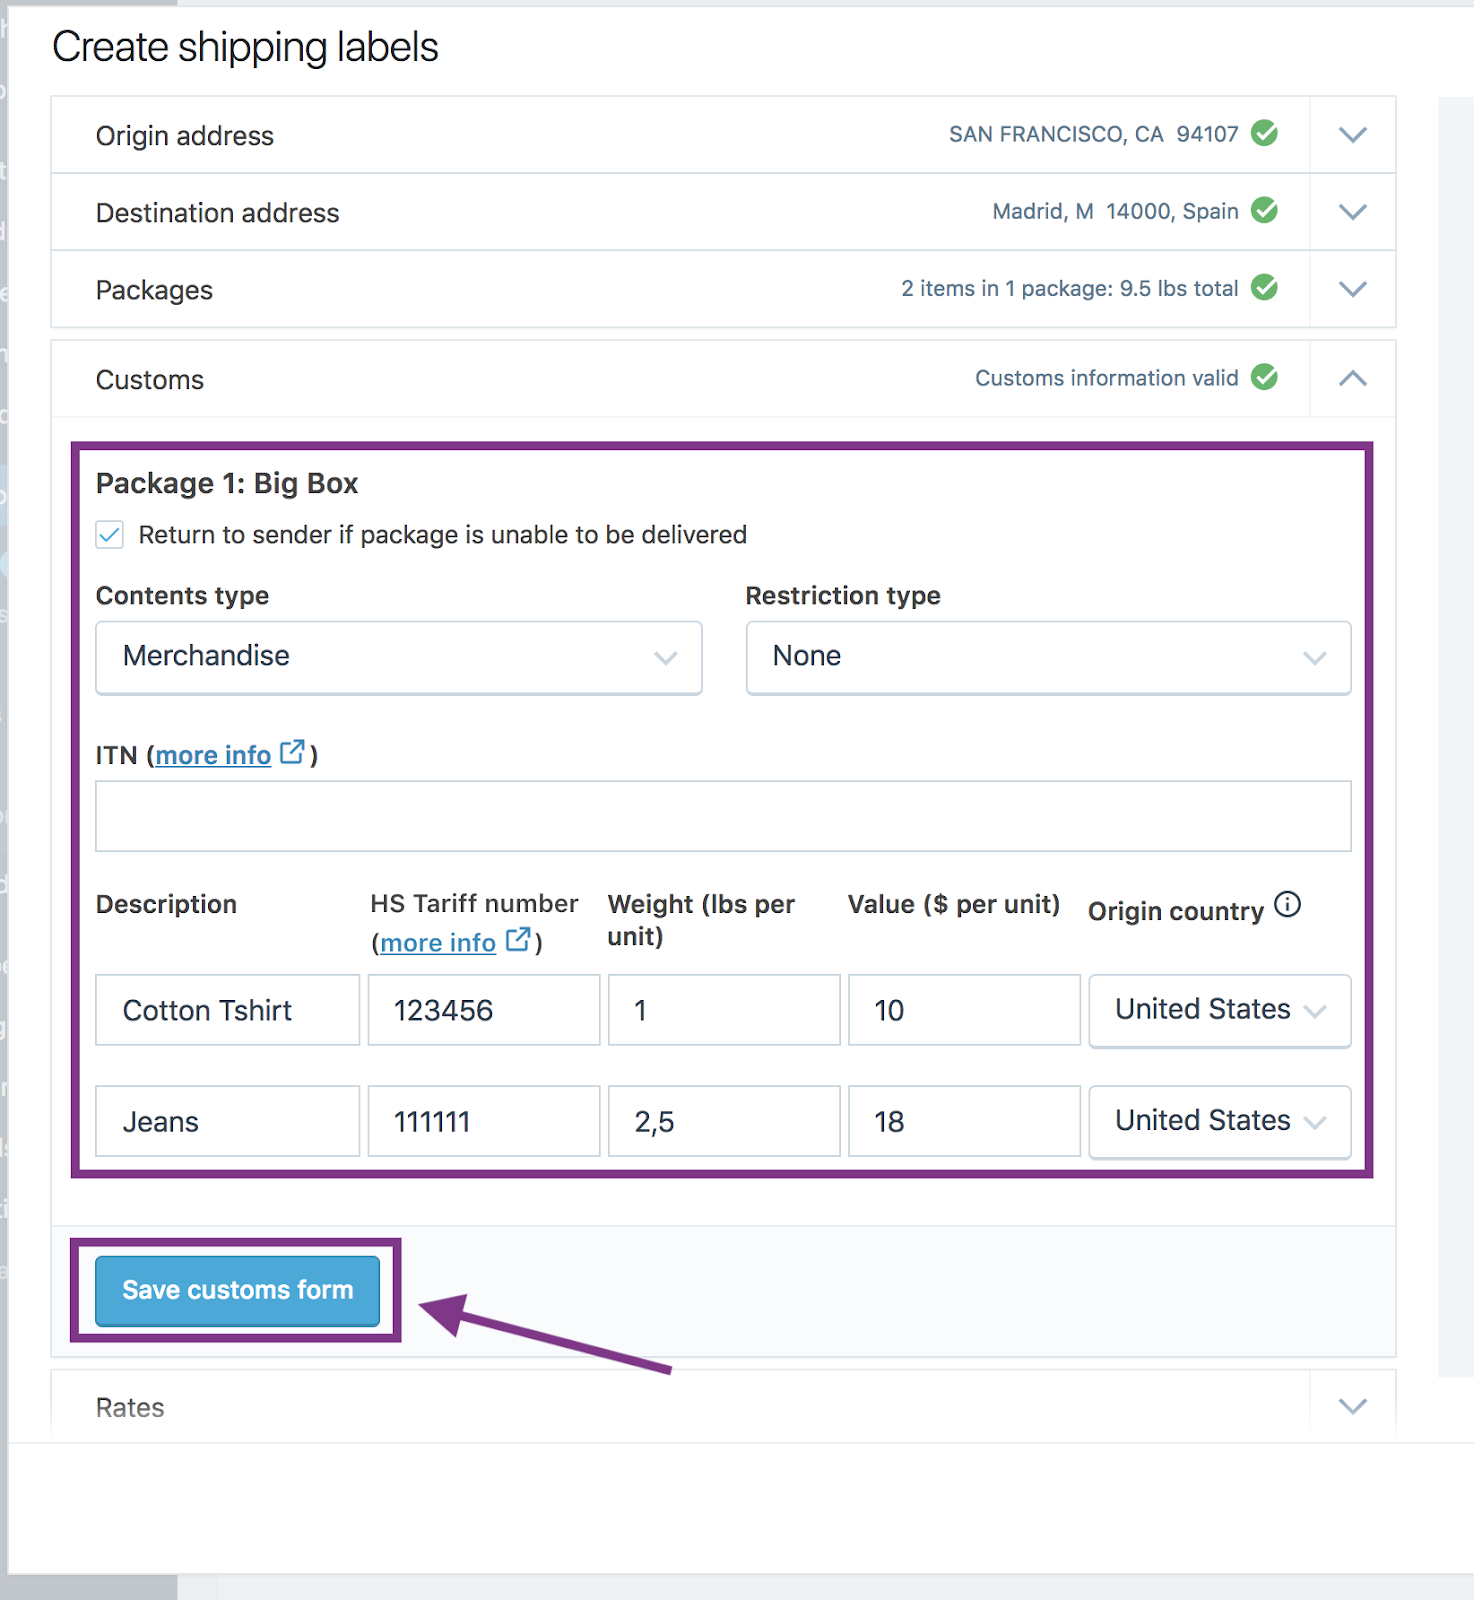
– USPS: A single delivery label will be split into three portions for some foreign shipments (proof of payment, customs declaration, and dispatch note). In some circumstances, you’ll need to arrange the three parts in the window pocket provided by USPS.
For nations that enable DHL’s Paperless Trade, WooCommerce Shipping will immediately submit your customs info on the internet.
– DHL: You must generate the customs documents for nations that DHL’s Paperless Trade does not provide. You will be required to print the custom document after generating your label. You can always search for and print customized papers from your order page. Choose one of the three ellipsis menu options in the Shipping Label meta box. Printing the shipping label is the last step.
After the custom documents have already been generated, they must be secured to the box utilizing plastic covers. Both DHL and USPS provide complimentary plastic covers for this reason.
Top 3 best WooCommerce shipping label plugins
ELEX WooCommerce USPS Shipping Plugin
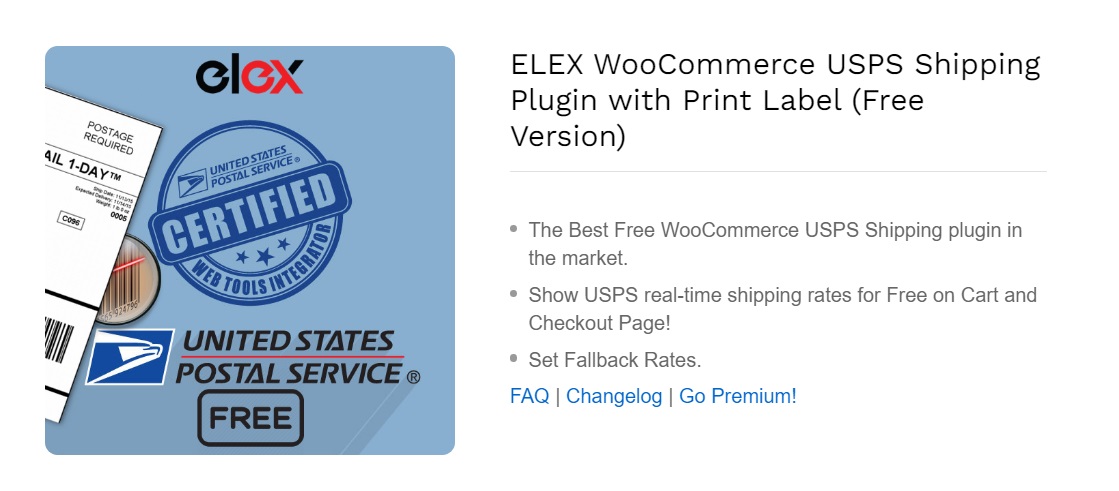
ELEX WooCommerce USPS Shipping Plugin with Print Label is an unpaid USPS shipping plugin with versatile and robust features designed specifically for product delivery procedures. Adding this plugin is an excellent method to improve the customer experience by adding clarity and transparency to your delivery costs.
Key Features
- Give your consumers live shipping prices depending on delivery location, weight, and product specs.
- Established a fallback rate to assist consumers in completing their transactions even when the API does not deliver live rates.
- The premium edition includes extra useful features such as thorough USPS shipping tracking.
Price: free
FedEx Shipping Plugin for WooCommerce with Print Label
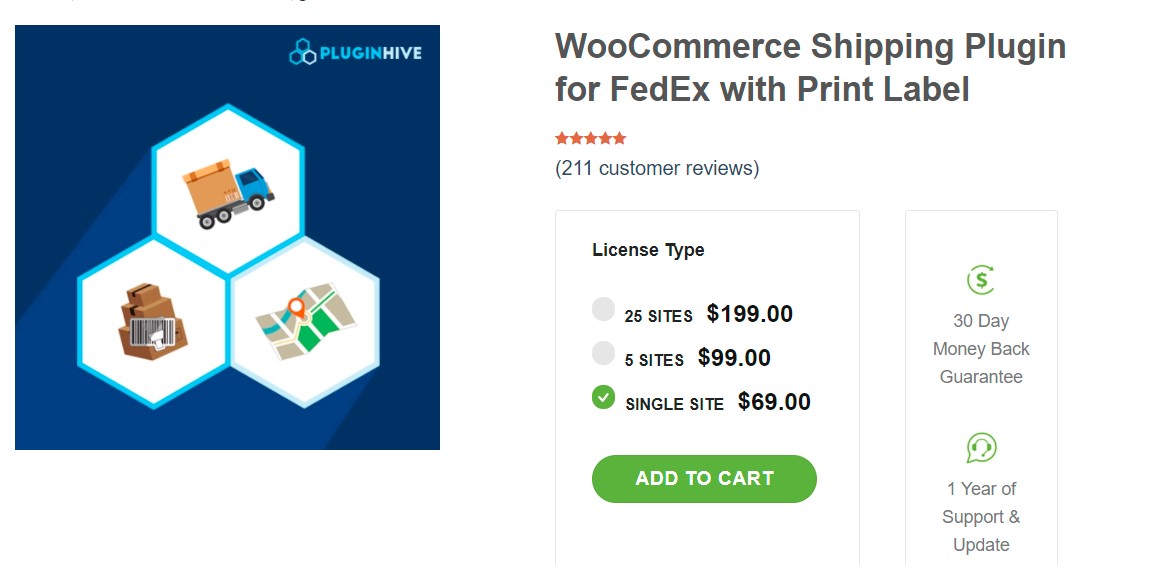
A WooCommerce plugin called WooCommerce Shipping Plugin for FedEx with Print Label enables you to fully automate FedEx shipping. The plugin enables you to follow deliveries, pay for postage inside of WooCommerce, print shipping labels, and identify boxes automatically for product packaging. It also presents shipping rates on the cart page or checkout page.
Key Features
- Make FedEx return labels
- Use the Plugin for assistance.
- FedEx Label Evaluation Hive Support Team
- FedEx Shipment Tracking in Real Time
- Custom Email Notifications to Customers and Store Owners
- Display FedEx Service Delivery Estimates
Price
WooCommerce FedEx Shipping Plugin with Print Label costs $69, $99, and $199 for single, five-site, and twenty-five-site licenses, correspondingly
WooCommerce Print Invoices and Packing lists
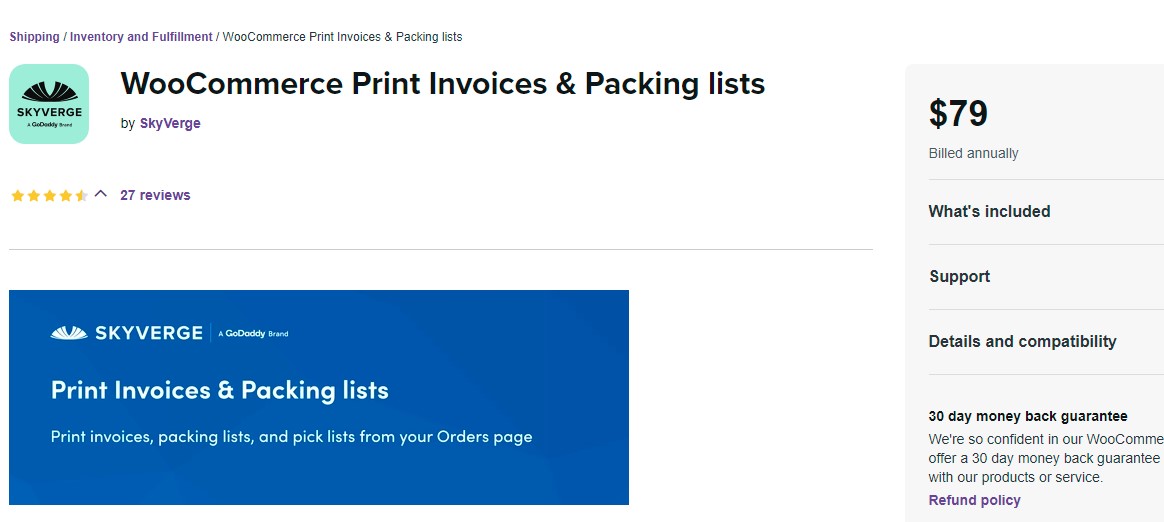
WooCommerce Print Invoice & Packing Lists is the best WooCommerce plugin for controlling invoices, packing lists, and pick lists. Even though this plugin does not assist you in printing shipping labels, it does enable you to print documents for orders immediately from the Orders page
Key Features
- Robust Processing of single and bulk orders
- Print or create invoices on a per-order or bulk basis. Emails will be sent only when the order has been paid for.
- You can edit the look and details of your document utilizing WordPress Customizer with a live preview – no coding required.
- Organize packing Listbox by category to facilitate order processing.
- Employ consecutive invoice numbers or WooCommerce shipment numbers as your invoice numbers.
Price: $79 per year
Final words
While several applications provide more options for making shipment labels, the majority of them come at a cost. In such instances, using the WooCommerce plugin to generate WooCommerce Shipping Labels is not only cost-effective but also productive in terms of expediting your shipment procedure. If you haven’t already, now is the opportunity to learn how to manage the process using the recommendations outlined in this article.