

Your payment gateways directly impact the buying decision of customers. The more payment methods are offered, the more sales will be made. In an ideal world, you’d pick an option that’s as simple as possible for your visitors to use. As a result, you’ll be removing roadblocks between your company and potential sales. Apple brand is more and more popular due to its high quality and security. Integrating your online store will potentially bring you more benefits. To take the most advantage of this trend, you should add an Apple Pay payment gateway to your WooCommerce store. That is why, in this article, we will present you with the background on Apple Pay payment and show you how to set up the WooCommerce Apple Pay payment method for your eCommerce site.
What is Apple Pay?
Apple Pay, a digital wallet and mobile payment system, adds another method for you to receive payments from your online store. The Apple Pay system, like other mobile payment gateways and money-sending apps (such as Venmo, Amazon Pay, and Google Pay), provides a simpler, more convenient way for customers to pay, allowing for secure purchases right from their devices.

In short, Apple Pay works similarly to a credit card, except that the payment information is saved inside a user’s device (typically a phone) so they don’t have to bring out their credit card for in-person or online payments.
Apple Pay users connect their debit and credit cards and save them in the Wallet app on their iPhone. Payments can be processed in seconds if an online or physical store accepts Apple Pay.
As a result, Apple Pay is another method for your customers to pay you, thus it’s critical that you provide that functionality on your website, whether you run a major WooCommerce store or an affiliate store.
What does Apple Pay require?
For those who want to choose the Apple Pay payment method on your WooCommerce store, they need to:
- Use the Safari browser
- Use an Apple device ( for example. iPhone, iPad, MacBook)
- Have Apple Pay enabled on their device
For you, store owners who wish to accept the Apple Pay payment method to your store, you need to add the following elements in addition to a WordPress site:
- The WooCommerce plugin to make your site become an eCommerce store.
- The Stripe for WooCommerce plugin to add a payment method.
- A Stripe account.
How to Set up a WooCommerce Apple Pay payment option?
In this tutorial, we will ensure that you have got the WooCommerce plugin on your WordPress site. Therefore, to accept Apple Pay payment, you can start with the steps below.
Step 1: Set Up Stripe for WooCommerce
There are many WooCommerce Apple Pay plugins such as Payment Plugins for Stripe WooCommerce, Authorize.net, CyberSource, Moneris, and Square plugin. In this article, I will show you how to integrate Stripe with WooCommerce because it offers reasonable packages and an intuitive setup process.
#1st: Install and activate the Stripe for WooCommerce plugin
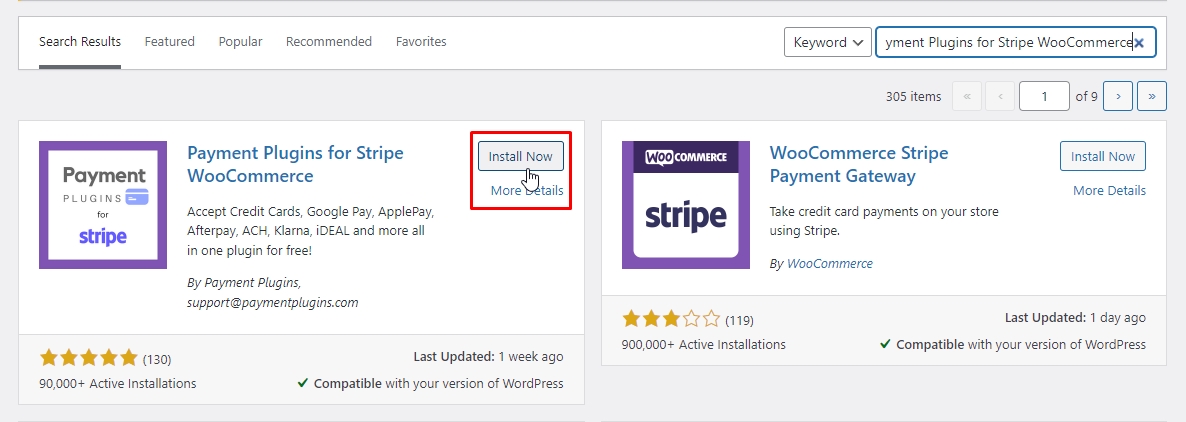
Now let’s learn how to install Stripe on WooCommerce. From the WordPress dashboard, click Plugins > Add New, and search for the Stripe for WooCommerce plugin.

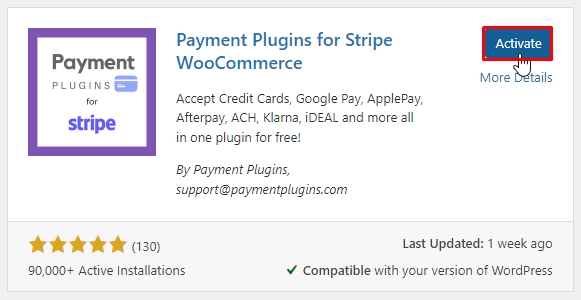
Then, hit Install Now > Activate
#2nd: Enable Stripe in WooCommerce
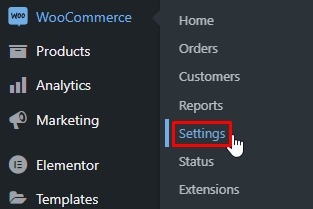
In your WordPress dashboard, click WooCommerce > Settings > Payment.

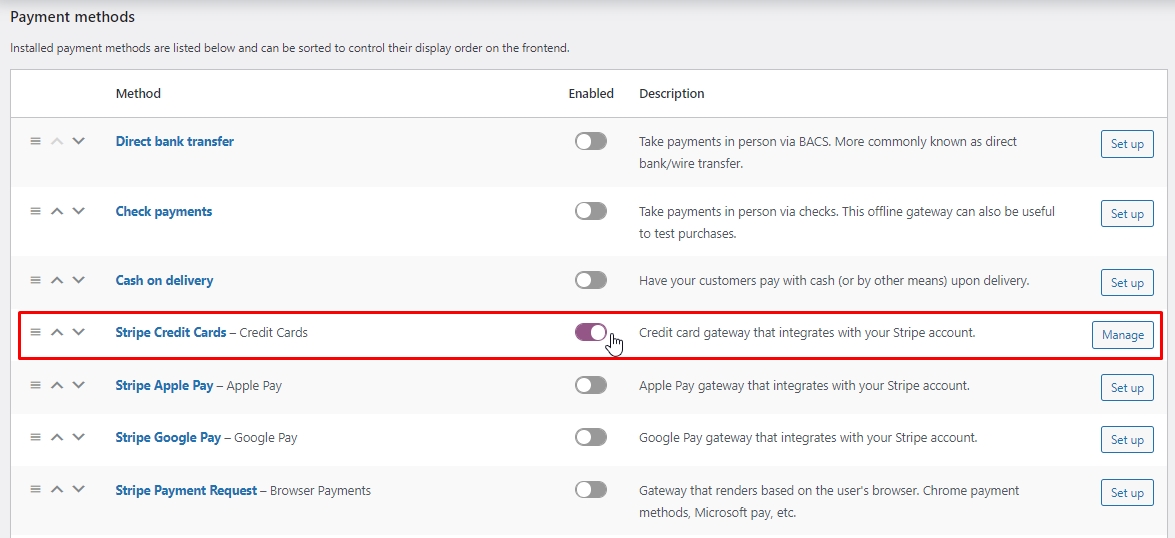
Scroll to the bottom of the page to find the Stripe Credit Cards payment option. You may notice some other fields with Stripe in the title, but ignore them for now; you must first enable the basic Stripe Credit Cards functionality.
Turn on the Stripe Credit Cards switch. Then, depending on which button appears for you, click Set Up or Manage.
#3rd: Create a Stripe account
If you haven’t got a Stripe account yet, you should now create a Stripe account. To do this, you need a business account to get your API keys from Stripe.
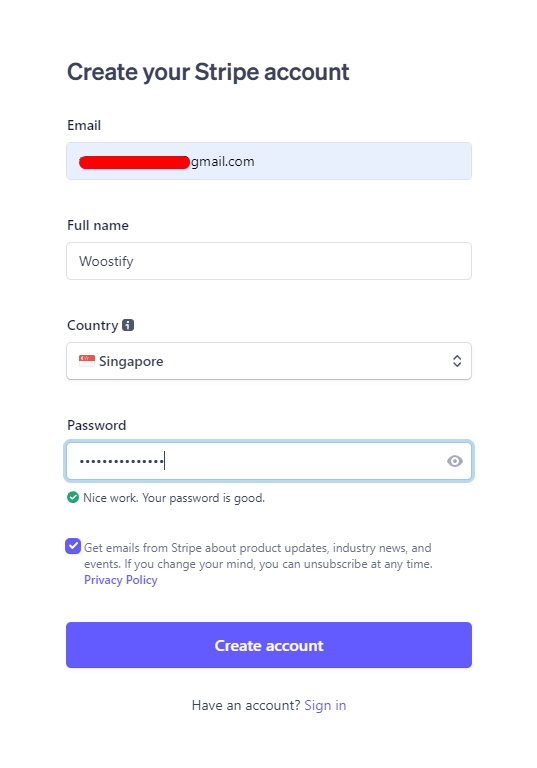
All you need to do is to fill out all the required information, including your company’s name and bank account information, on the company’s website.
#4th: Get Stripe API keys
In this stage, you should get your Stripe account keys. From the Stripe dashboard, click Developers > API keys.
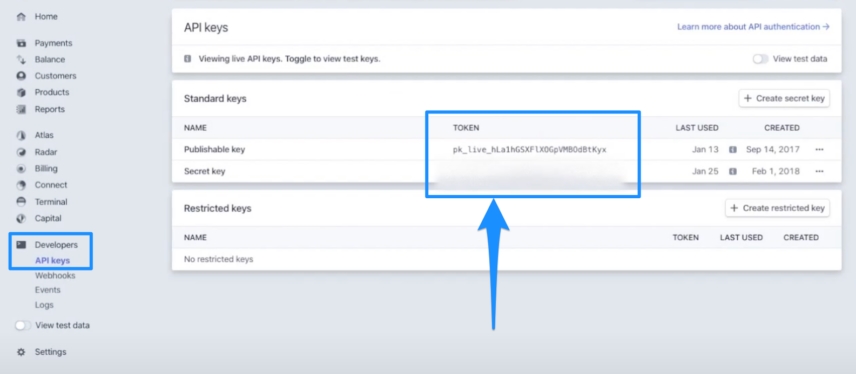
Then, you will be able to view your publishable and secret keys. Copy these values.
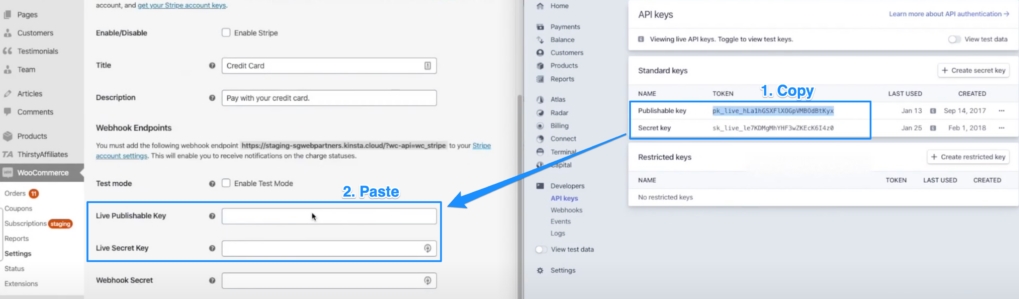
After that, paste these values in the API credentials section. Save Changes.
Next, from the Stripe dashboard, click add endpoint, copy the webhook endpoint in WooCommerce and paste this value in the endpoint URL in Stripe.
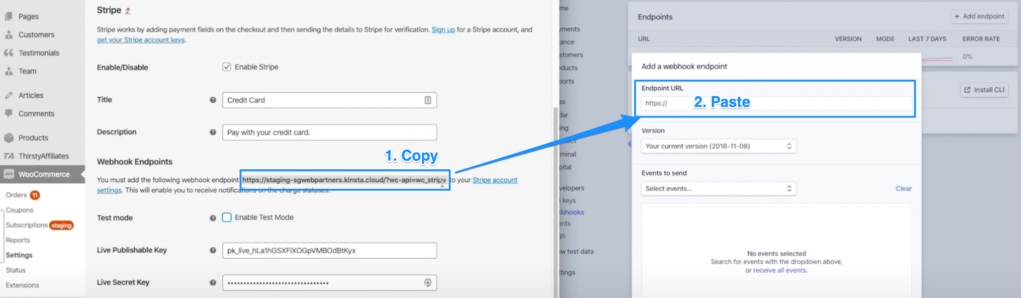
Finally, copy the webhook secret in Stripe and paste this value into WooCommerce.
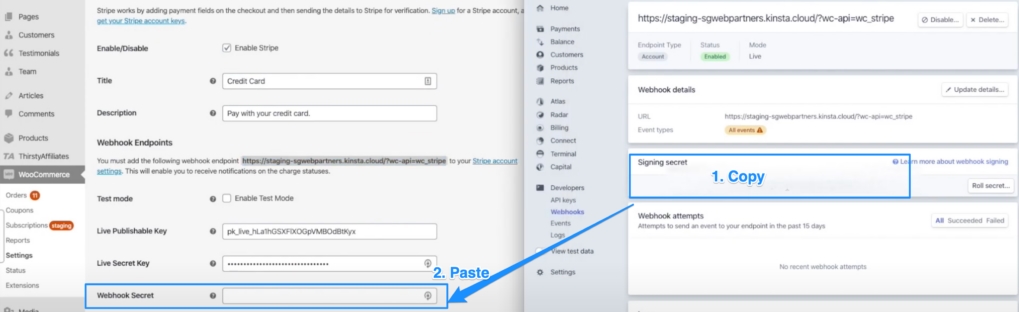
Then, remember to click Save Changes to update all things in WooCommerce.
#5th: Link Stripe using the API keys
Navigate to the API Settings section on the new page.
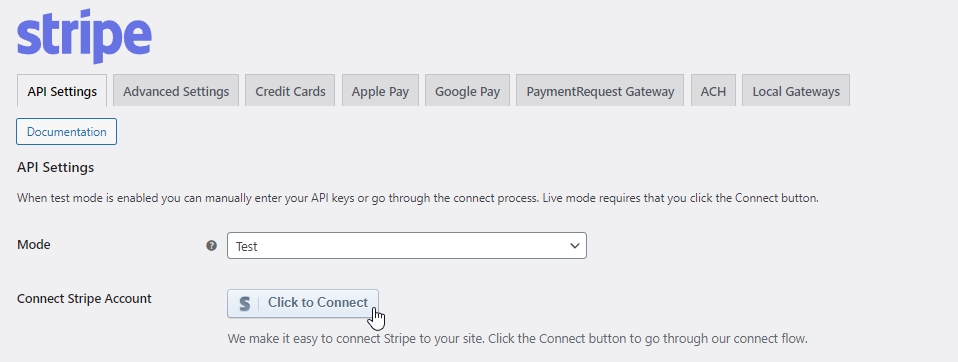
If you’re ready to accept payments, change the Mode to Live. If not, stay in Test Mode.
In the Connect Stripe Account field, click the Click to Connect button. This takes you to a new page where you can log in to your Stripe account and connect it to WordPress.
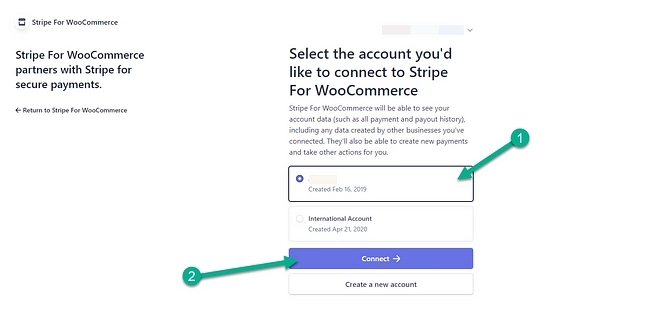
WordPress now takes you to the third-party connection page, which displays your Stripe account if you’re logged in. As a result, if Stripe prompts you to do so, you must log into your account.
Once logged in, select the Stripe account you want to link to your WooCommerce store.
Click the Connect button.
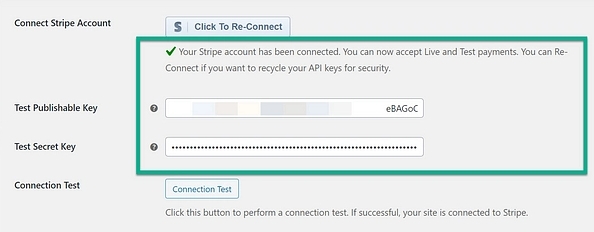
You should now see a green checkmark and a message indicating that your Stripe account has been successfully connected.
This generates a Publishable Key and a Secret Key, which are then added to the appropriate fields in the WordPress dashboard.
Note: The Stripe API section also displays the corresponding keys. This is important because you can get the keys from the Stripe dashboard if you need to. If the automated process fails, it’s also a good place to re-generate keys.
Scroll down on the WooCommerce Payments page to click the Save Changes button.
The WooCommerce stripe setup is completed. This ensures that your Stripe keys are stored within WordPress and ready for payment processing.

Step 2: Enable Apple Pay Payments Within Stripe
#1st: Activate a WooCommerce Apple Pay button
Currently, the Stripe integration with your WordPress site allows eCommerce credit card processing when a customer completes the store’s checkout process.
And while this is a necessary step toward adding the Apple Pay button, there are still a few more steps to complete.
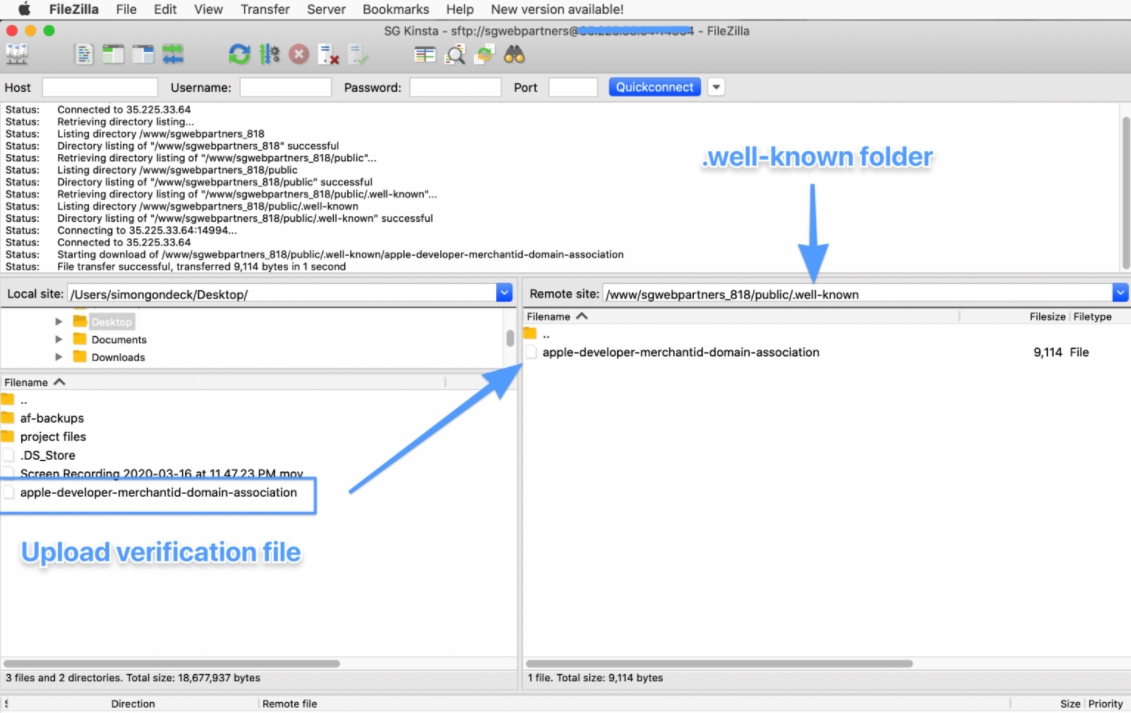
Now, you need to ensure that you actually own this domain. Normally, you have to upload a verification document to a section of your hosted website’s files (it should be an apple-developer-merchantid-domain-association file).
However, you almost never have to do this manually. Simply go to the Apple Pay section and click the Register Domain button.
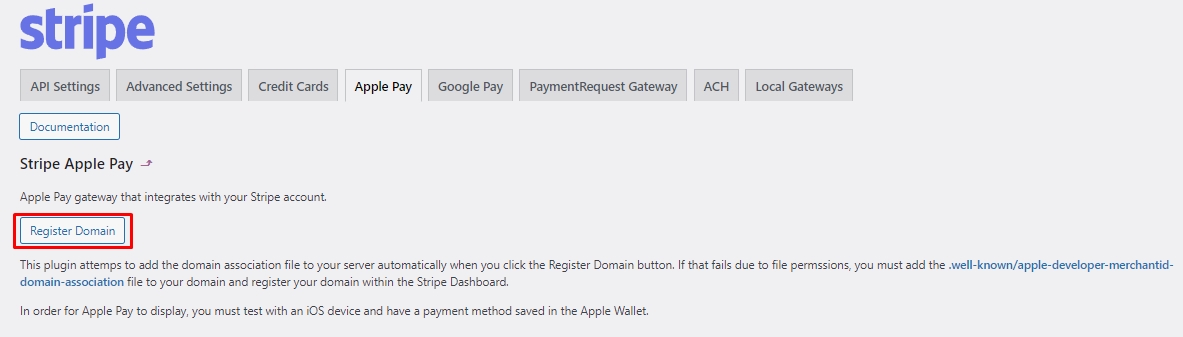
After that, you should see a message stating that the Domain was successfully registered.
Go to the Stripe dashboard and click Settings > Payment Methods > Apple Pay to make sure everything is working properly.
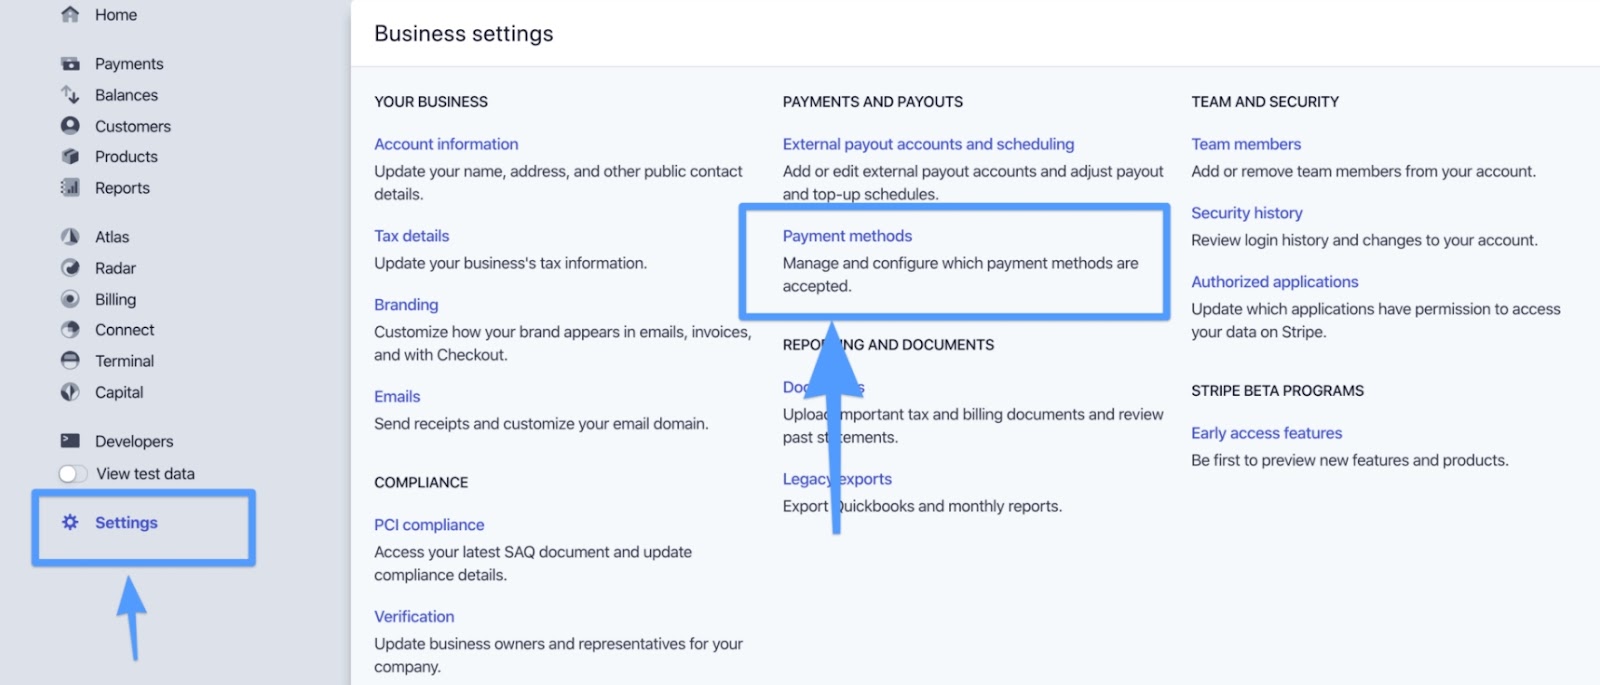
Your domain name should show up in the list of Web domains.

Once the domain name has been verified (either automatically or manually), you can check if the Apple Pay payment gateway is working well.
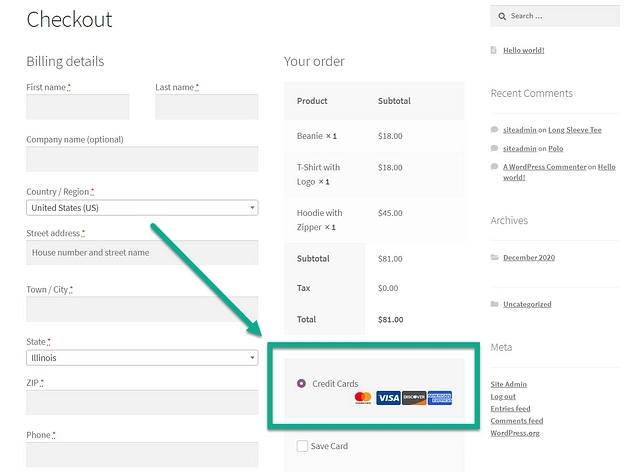
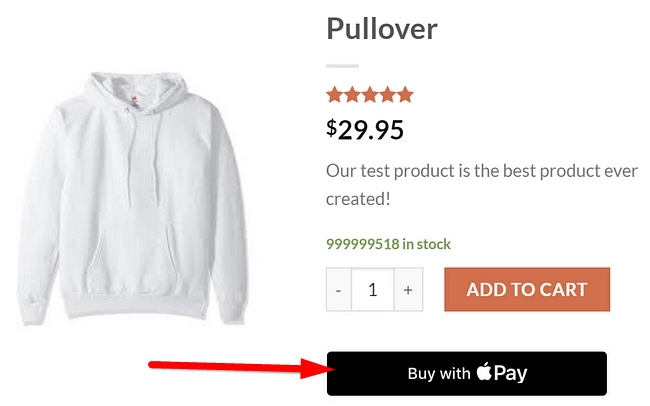
When a customer accesses your website via a mobile device with their Apple Pay account configured, they now will see the Buy With Apple Pay button at the product page or checkout page.
#2nd: Troubleshooting WooCommerce Apple Pay buttons
If you’re getting errors or think the process went smoothly, but you still don’t see an Apple Pay button on your site, look into the following common issues to solve your problem:
- The user isn’t using an Apple Pay-enabled mobile device. Apple Pay can only be used on a phone if the user has an Apple Pay account. So we recommend linking a credit card to your Apple Pay app on an iPhone to test and see how the button works on your own site.
- The site isn’t live yet – API keys for test and live sites are generated separately. The Apple Pay button will not appear if you’re in Stripe Test Mode, despite the fact that Stripe simulates transactions. You have to be awake.
- Stripe blocks payment functionality (especially Apple Pay) if you don’t have an SSL certificate and a “https://” (not a http://) before the domain. To enable or install SSL, you can choose any SSL from different options like a Sectigo Wildcard SSL certificate (for multiple subdomains) for payment details and other online data security.
- The Stripe for WooCommerce plugin was unable to generate the Stripe API keys automatically – Although the Stripe for WooCommerce plugin usually does the trick, you may need to manually render them in the Stripe API section.
- The plugin is unable to confirm ownership – If this is the case, upload a verification file to your website using the instructions provided in the error message.
Step 3: Test if Apple Pay is working
When all things are done, you should check the Apple Pay payment option again to see if it works perfectly on your WooCommerce store as well as on customers’ devices. To get the best results, you should:
- Open the Safari browser on both smartphones and computers.
- Visit your website and place one of your products in your shopping cart.
- You should be able to pay using Apple Pay. Is Apple Pay not showing up on your device?
- Proceed to the Checkout page.
If this process is smooth, you can believe it will work well on your clients’ devices, too. If not, check all steps again and fix any wrong steps until you get the expected results.
Final thoughts,
WooCommerce Apple Pay certainly benefits both you, the store owner, and the customers with security, more payment options, and better UX.
Adding Apple Pay to WooComerce websites is a smart move. This process seems easy for experienced WooCommerce users, however, it may be complicated for beginners. Hope that this article helped you set up the Apple Pay payment gateway for your WooCommerce store successfully. If you find it so difficult to start with, you should hire a developer to help you process it.