

One of the most crucial images you can use in your blog posts is a featured image. The perfect featured image, when matched with an interesting title, grabs visitors’ attention. The featured image is one of the first things visitors see when they click on your page, and it may influence their view of your content before they even begin reading. Therefore, optimizing WordPress featured image size is very important.
Depending on the style you’ve chosen for your website, these photos might also serve another significant purpose. They can be shown at any area on your website where an article is linked. Let’s imagine you have a sidebar that displays the top five most popular articles on your site. In that sidebar, you’ll be able to display the names of your posts, as well as the featured photos that go with them. This can improve the visual appeal of the website and, as a result, raise the click-through rate for certain posts.
All of this is to imply that you must optimize WordPress featured image size. We’ll guide you on the way to changing the size of your featured images to better match your pages and articles in this blog.
What is WordPress featured image?
A featured image can be considered to be the blog’s main image in WordPress. On your home page and social media, they typically appear next to the title of each post.
Featured images may allow you to improve pageviews and user engagement. Search engines and social media websites can take advantage of these featured images in search results and social media news feeds. Featured photos are frequently connected with blog posts, but they may also be used for pages and custom post types.
Default featured image size in WordPress
For displaying your images, WordPress provides you with four options as follow:
- Thumbnail (150 x 150 pixels)
- Medium (300 x 300 pixels)
- Large (1024 x 1024 pixels)
- Full size (1024 x 1024 pixels) (the WordPress featured image full size of a certain chosen image).
You might wish to adjust the WordPress featured image default size if you want your images to be the same width as your content or if you want them to fit in your WordPress theme. You have complete control over the maximum image size shown on your posts and pages. Around 1200 x 628 pixels should be the best WordPress featured image size for you. These dimensions appear well when posted on social media feeds and perform well across WordPress themes and page layouts. Our guide will show you how to design default WordPress featured image size for your website or blog.
How to Set a Featured Image in WordPress?
A featured image can be uploaded to a WordPress blog by following these steps:
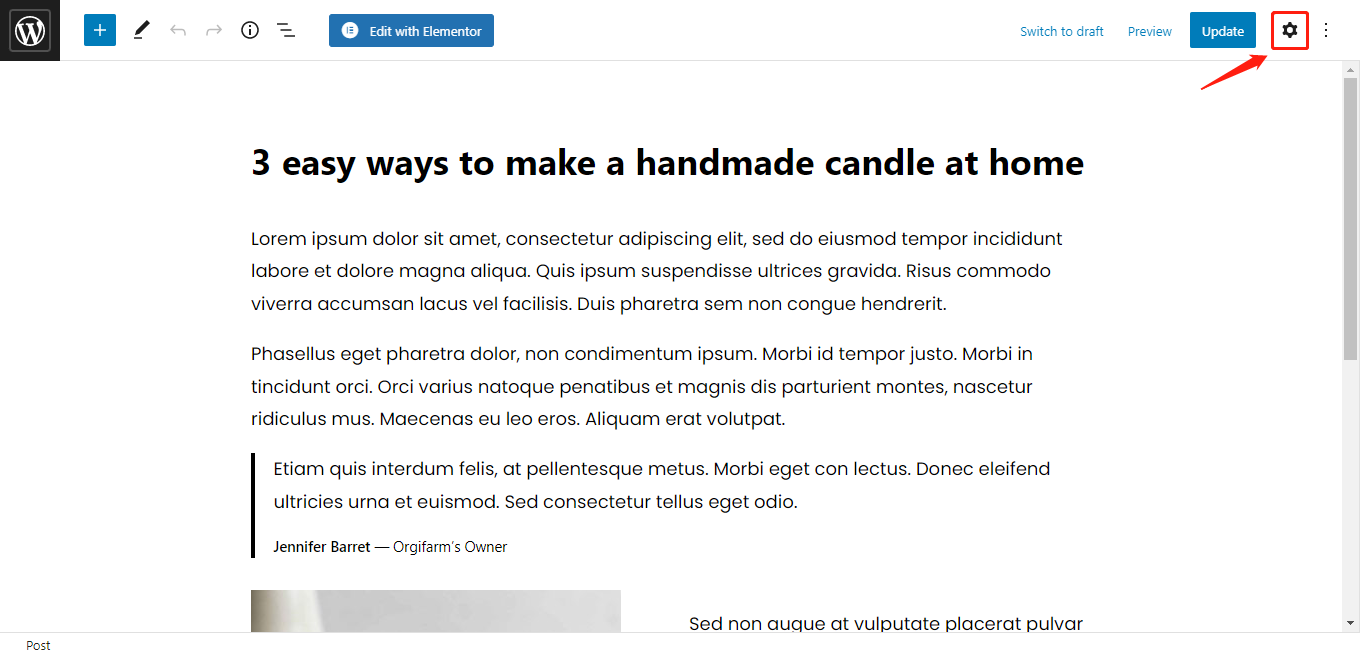
Step 1: Start editing the post or page you’re working on
To access the settings panel, click the gear symbol in the upper right corner.
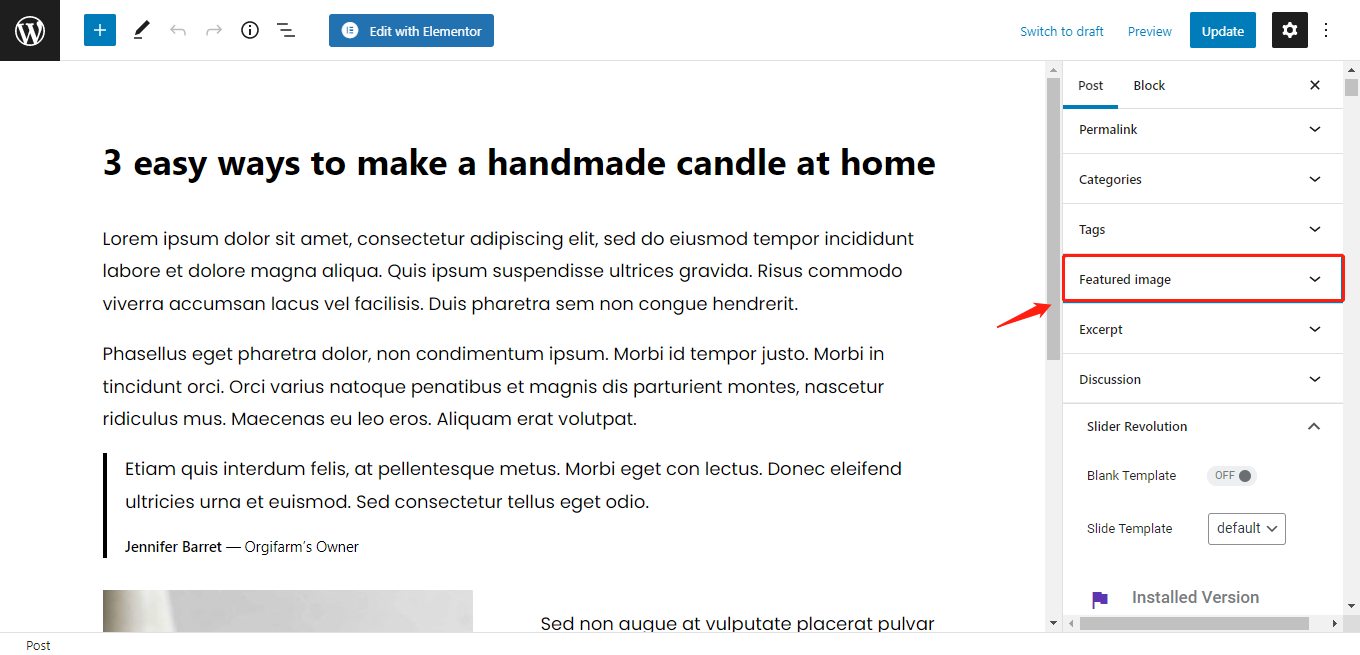
Step 2: Set your featured image
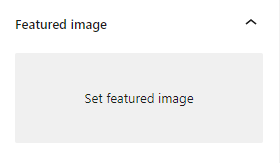
- Choose Featured image > Set featured image from Post tab’s options panel.
- Choose a featured image from your media library or upload one.
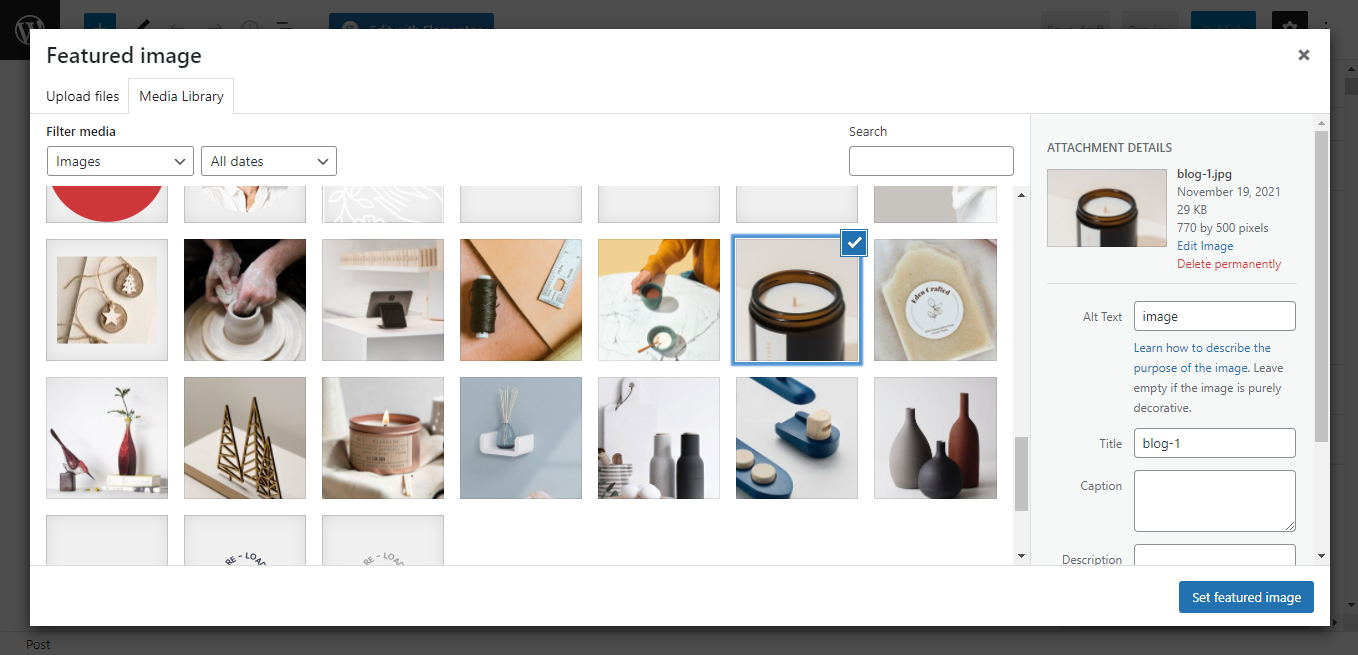
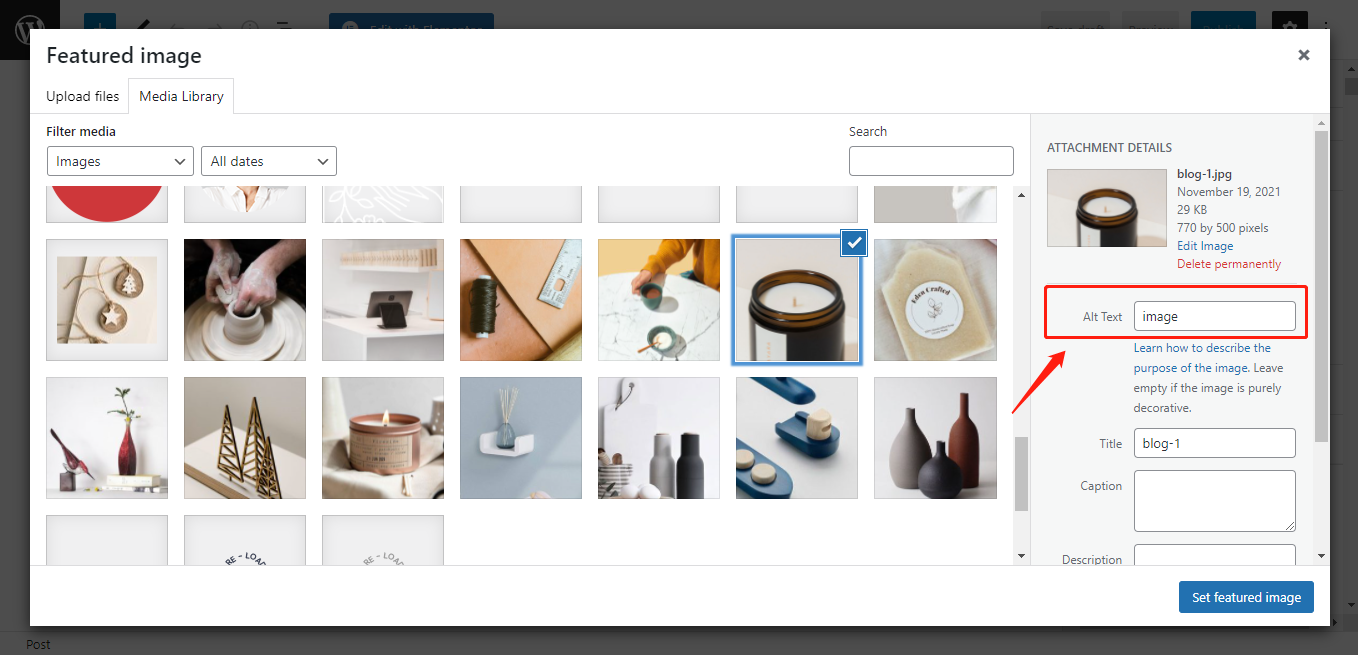
- Fill up the Alt Text area with alternate text that explains your featured image. Alt text that is informative and correct is an important part of enhancing your WordPress site’s SEO.
- Include a Title, Caption, and/or Description if needed.
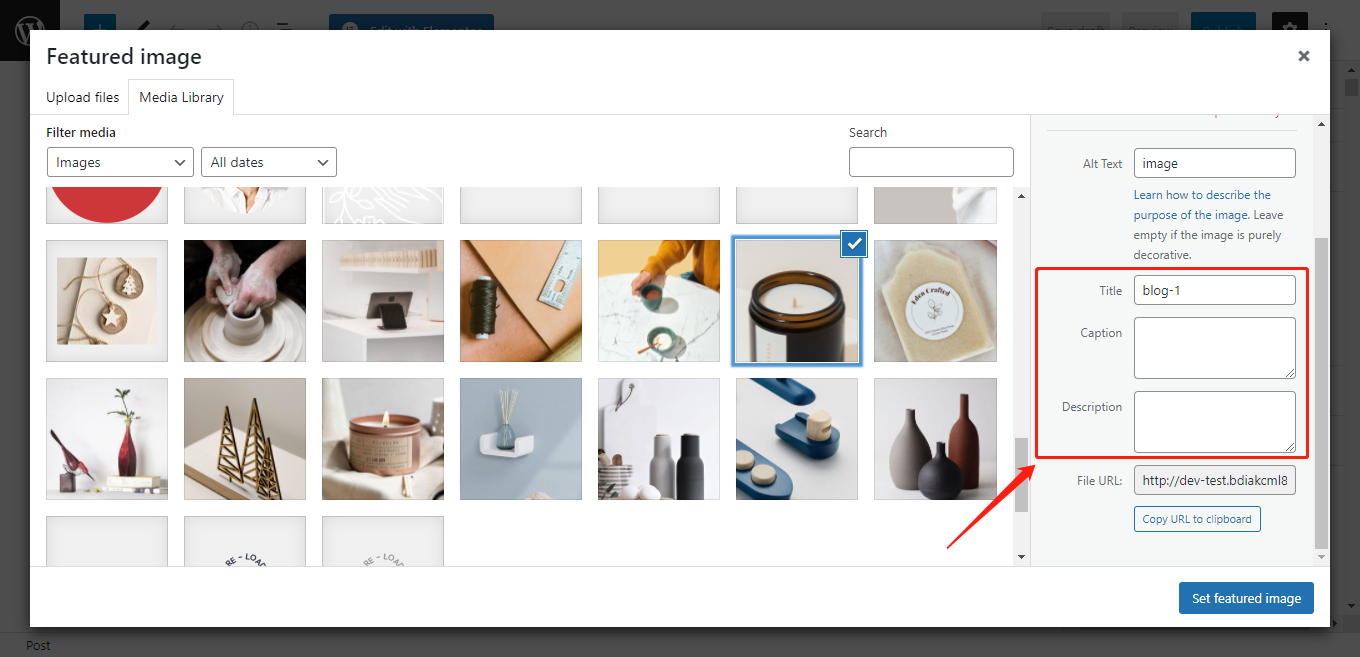
- Selecting Set featured image allows you to change the featured image.
- To see your featured image in context, return to the editor and click Preview.
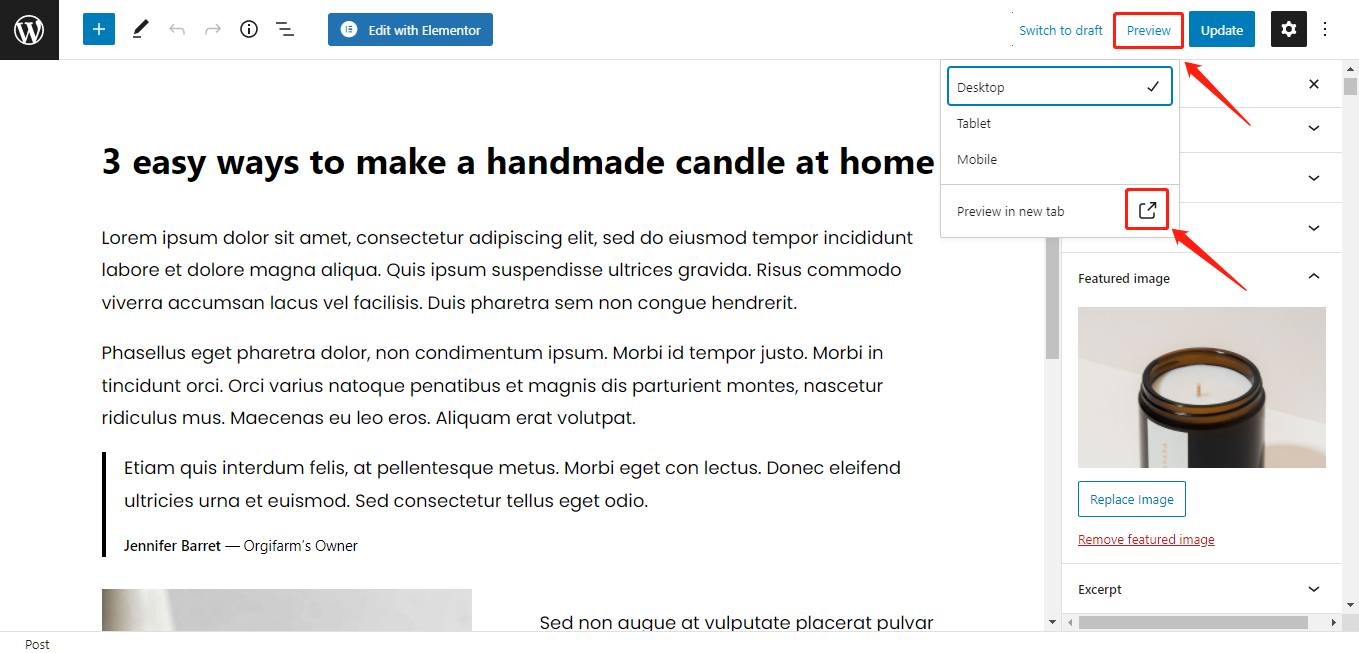
Your featured image can be replaced or removed from your posts’ settings, which can be found under Post > Featured image.
Why You Should Change the Featured Image Size in WordPress?
When you set a picture to the media library, WordPress will create thumbnails. By default, WordPress publishes images in four different sizes:
- Thumbnail (150px)
- Medium (300px)
- Medium Large (768px)
- Large (1024px).
In version 5.3, two new variations with widths of 1536px and 2048px were included. By default, they are not accessible from the WordPress admin panel. Some themes enable you to customize WordPress featured image size. The WordPress Twenty Twenty-One theme, for instance, displays a 1568px wide variation of the article title at the top. For whatever featured image you upload to your website, WordPress will make all of these variations.
There is some WordPress featured image size too big depending on the theme you’re using. The featured image in your post, for example, was only viewable at a width of 1250px. WordPress, on the other hand, continued to display the 1568px wide image when you browsed the post.
A larger image requires a higher file size, which is a waste of both your and your visitors’ resources. When you only display featured images at a maximum width of 1250px, there’s no need to produce images that are 1568px wide.
Changing the WordPress featured image size will save storage space and allow your viewers to load pages faster. It’s a win situation!
How to change WordPress featured image size?
Changing the appearance of your featured images is a significant change to your site’s appearance. In fact, WordPress set featured image size for custom post type. In this tutorial, we’ll show you to change the WordPress site featured image size by using a plugin.
Here we will explain to you how to change the size with WordPress featured image size plugin.
Step 1: Enable your plugins
- If you don’t have any plugins enabled, WordPress will only display three image sizes in Settings > Media. Thumbnail, Medium, and Large are the three options. You may alter these three values without installing any further plugins if you simply want to change them.

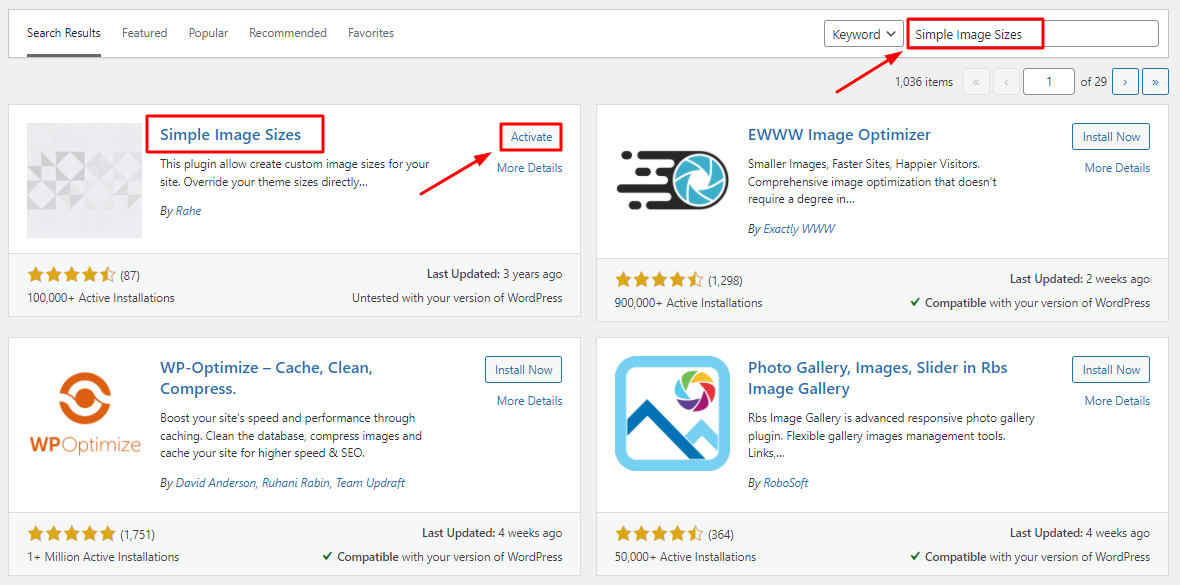
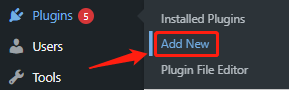
- If you want to adjust the sizes of additional image variants, you’ll need to edit the theme file or utilize a plugin. Using the Simple Image Sizes plugin, you can learn how to do it. But firstly, you have to install the plugin in Plugins > Add New.

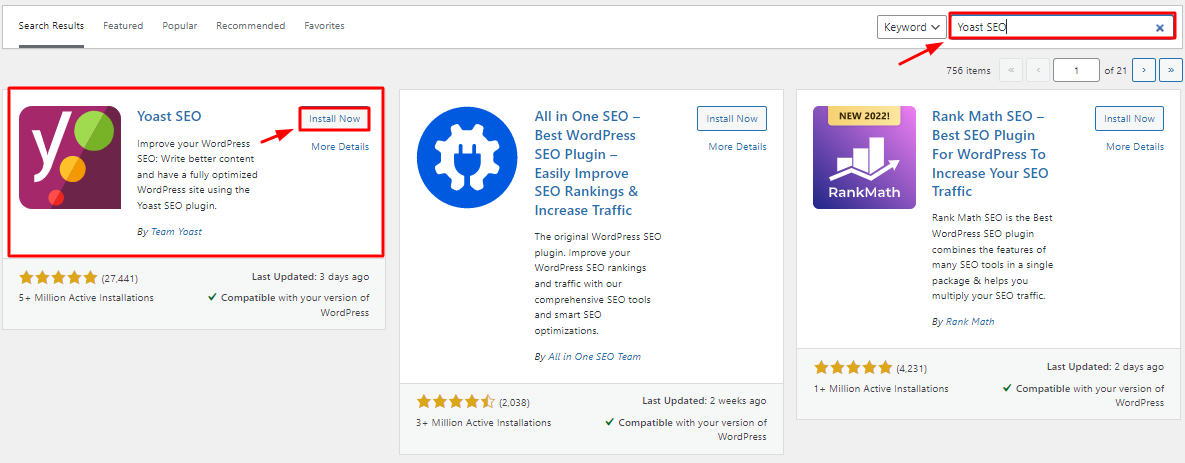
Search for the plugins on the search tab. Then click Activate button to install the plugin.
Step 2: Set your own dimensions
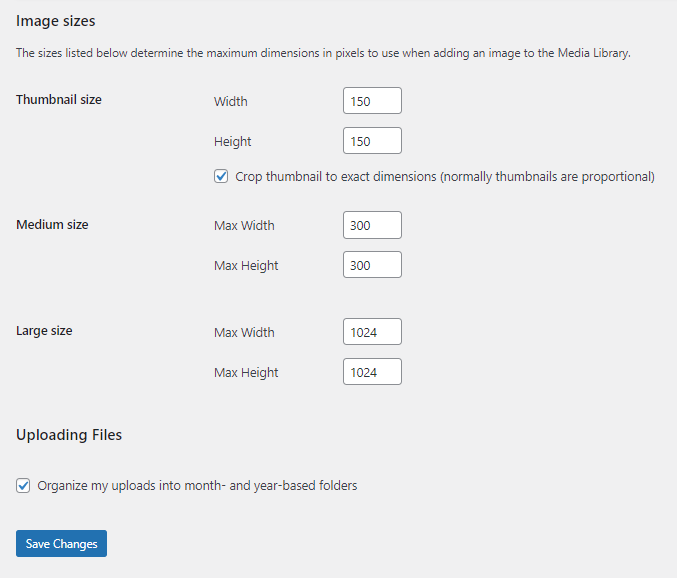
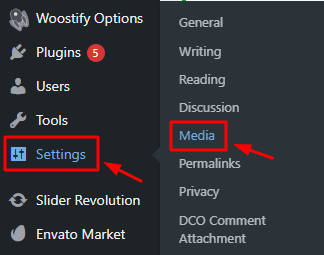
After you’ve installed and enabled the plugin Simple Image Sizes in step 1, you go back to the step: Settings > Media
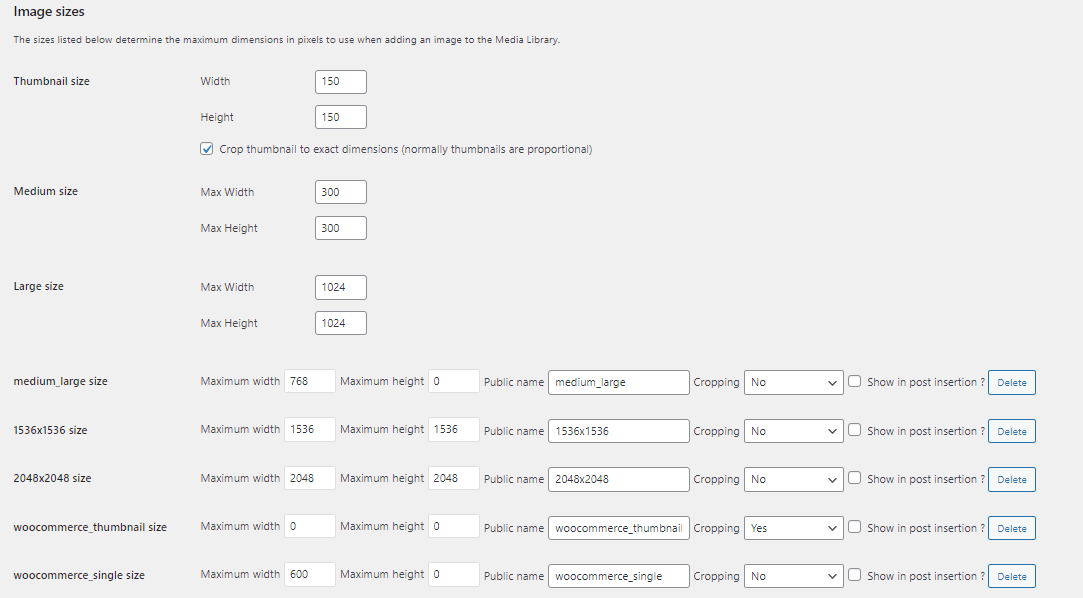
Now you can now just set your own dimensions with different image variations. Set both the width and height to zero to avoid WordPress producing any images of that size. For the 1536px and 2048px variations, for example, you can set the width and height to 0.
Step 3: Save your changes & Regenerate Thumbnails
- After you’ve specified your own sizes, click the Save Changes button. Any further uploads to your media library will generate variants based on the size you select.
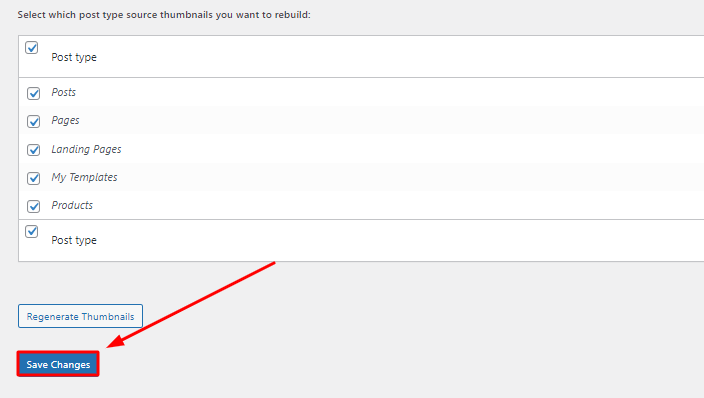
- Regeneration of changed variations for old images is the final thing you should do.
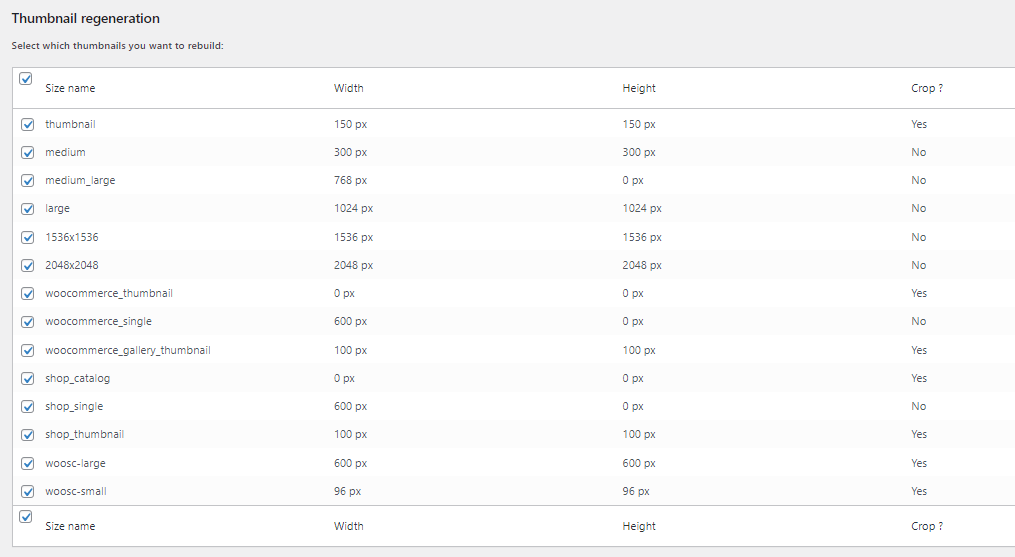
Simply choose Regenerate Thumbnails and the plugin will handle the rest.

How to optimize WordPress Post Thumbnails for Social Sharing?
The importance of featured image for social sharing
The featured image which is highlighted plays a crucial role to attract attention when you share an article or a product listing on social media. Whenever you want to interact with your viewers, you need the proper featured image with perfect image quality or the appropriate WordPress blog featured image size. You can also use an image enhancer to improve and refine the visual quality before publishing. All of these factors will contribute to having the perfect featured image.
Optimize your WordPress post thumbnails with the Yoast SEO plugin
Plugins allow you to make your WordPress site more functional. They also make a variety of normally time-consuming tasks easier, for example, using the different SEO plugins available. WordPress SEO plugins give you a checklist, so you can quickly follow through and finish all of your on-page SEO ranking factors.
You can use the Yoast SEO plugin to optimize your WordPress post with the following steps:
Step 1: Select Plugins > Add New
Step 2: Search for Yoast SEO on the search tab
Step 3: Start optimizing your post with Yoast SEO
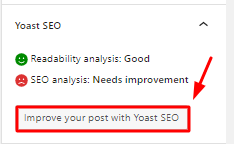
- Open any WordPress posts you need to optimize. The Yoast SEO function will appear with a general SEO evaluation once you open the post.
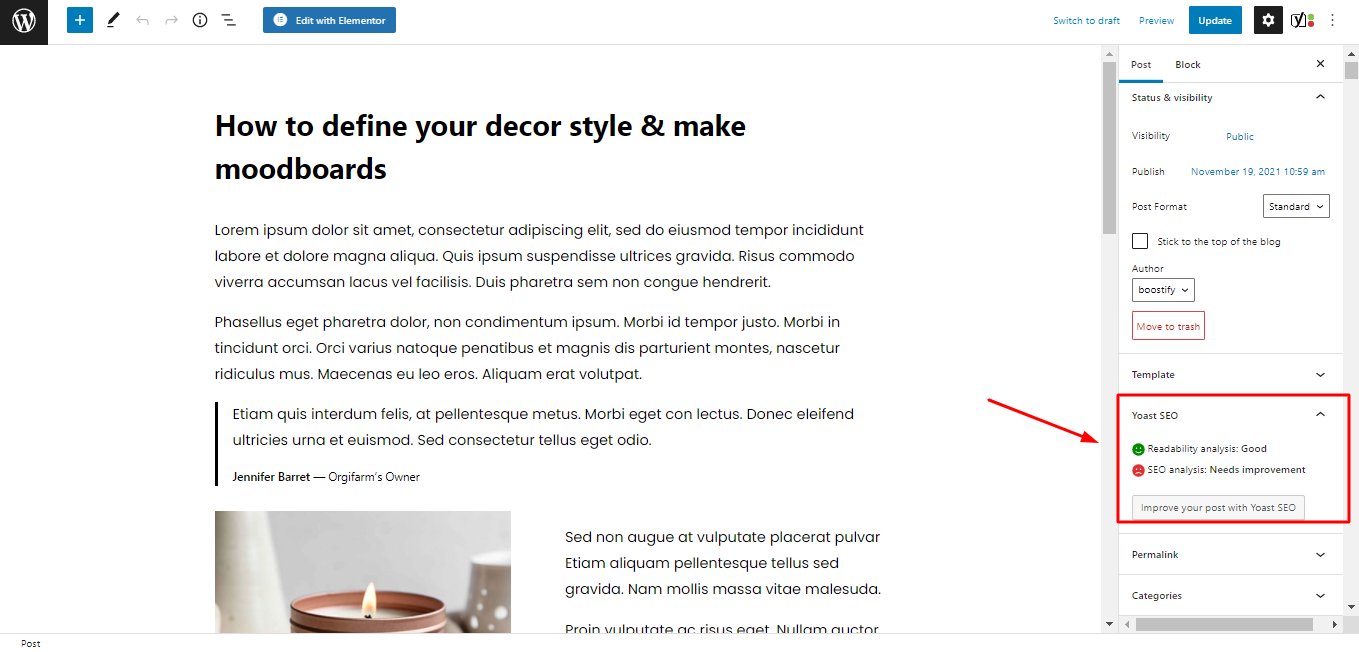
- Choose “Improve your post with Yoast SEO” to optimize your WordPress post thumbnails with advanced SEO tools on Social Media like Facebook, Twitter.
- You can see what your WordPress post thumbnails on Social Media look like by selecting Preview on any social media platforms you want.
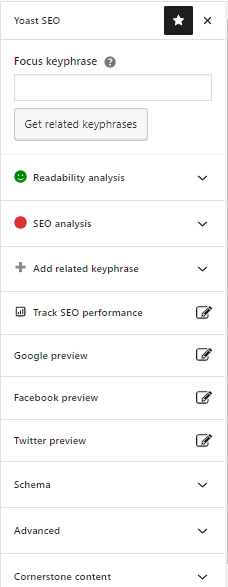
- Insert your Image, Title, Description you want to display with your post thumbnails on Facebook or other platforms.
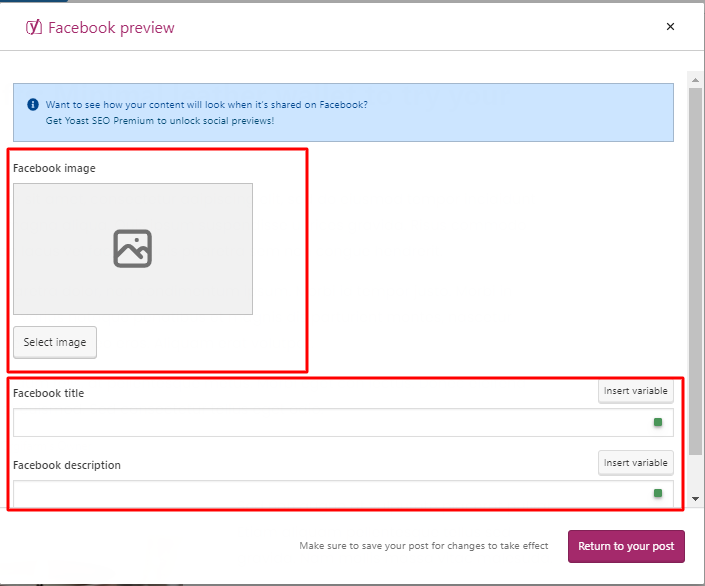
It’s no doubt that the Yoast SEO plugin gives you lots of tools to help you do well in the search results. Once you use the Yoast SEO plugin, you can include a unique image, title, and description for each social media platform. It also shows the appropriate image size for major social media networks.
In this way, you won’t have to generate a different post for each platform. All of this may be done simply from your WordPress dashboard.
How to Optimize WordPress Featured Images for Search?
While a well-designed featured image plays a role to attract readers, a well-optimized image assists search engines in driving organic traffic (and readers). When it comes to optimizing your WordPress featured image size in post, it’s more than just having an ALT text.
We’ve given a few suggestions to help you improve your featured images.
- Make use of unique images
Instead of finding a generic stock photo, we advise using unique photos or developing unique images. A background remover can be particularly useful in creating distinct visuals by isolating your subject and enhancing its impact. There are many tools available that can help you achieve this and
elevate the quality of your images.
- Use ALT Text SEO-friendly
An image on your website fails to load for some reason? And you have no idea what’s wrong. The ALT text (also known as Alternate Text) functions as a backup plan. Including your keywords in the featured image is a good idea. This aids in the ranking of your image and text on the search results page.
- Pick the correct file name
You’ve just returned from a trip and are working on a piece for your travel blog. Would you provide your photo names like image1.jpg, image2.jpg, and so on? Or would you call your photos after the locations they depict, such as Maldives-beaches.jpg? Keywords should be included in the file names of your images.
- The title and description of your page
After checking all the tips discussed above, creating a page title and description on your website with relevant keywords will assist Google Image search in identifying your images.
WordPress Featured Image Best Practices
When it comes to creating your ideal featured image size for WordPress, there are some best practices for you to consider.
Make use of high-resolution photos
Your featured image will be used to represent you on social media. You’ll want to pick an image that works both as a thumbnail and as part of your post. When creating or developing an image, it’s better to consider a higher-resolution image that can be expandable.
Maintain consistency
You may insert your logo and brand it appropriately when making a custom picture. Keeping your image designs constant boosts branding and makes it easier for your visitors to recognize you. Using a logo maker can simplify the process of creating a professional and cohesive brand identity across all your visual content.
Use relevant images
You may know that pictures are processed 60,000 times quicker than text in the human brain, according to Hubspot.
We seem to be first impressed by the photos before reading the headline of the post. The photos you choose can not only grab viewers’ attention, but they can also indicate the page’s context. As a result, you should select an appropriate image. One that correctly describes your page. Otherwise, you risk having a greater bounce rate. Most modern WordPress themes will have the option to show the featured images on WordPress posts. Here is a simple method to remove or hide the featured image in individual posts or on all pages.
Ensure that you are aware of your legal rights
Using Unsplash, Pixaby, and other copyright-free photo sites to find stock images? You should double-check for any license issues.
Search for images that have a Creative Commons license while you are searching on Google. Only use this option if you aren’t going to make your own photos.
Conclusion
In this article, we covered a few key aspects of featured images, as well as two different ways to alter WordPress featured image size. We hope this article has given you a better understanding of featured images and how to change WordPress featured image size.
Another thing to keep in mind is that you should avoid using random image size numbers. Determine the most popular picture sizes shown on your website and adjust your settings accordingly.