

Add to Cart button is certainly one of the most vital factors on any WooCommerce store since it is the button that directly leads to sales and revenues.
Therefore, the better the Add to Cart button is, the more profit your online store will get. In this tutorial, we will present some ways for you to customize WooCommerce Add to Cart button.
- Default Add to Cart button in WooCommerce
- Why do you customize WooCommerce Add to Cart button?
- How to customize the Add to Cart button in WooCommerce?
- 1. Change WooCommerce add to cart button text
- 2. Replace WooCommerce Add to Cart Text with Icons
- 3. Add text before/after the Add to Cart button on single product page
- 4. Change WooCommerce Add to Cart button color
- 5. Make sticky Add to Cart button on WooCommerce
- 6. Add a Direct Purchase button along with the Add to Cart button
- 7. Display Add to Cart Buttons Anywhere on Your WordPress Website
- 8. Customize the Added to Cart Messages
- How to Fix WooCommerce Add to Cart Button Not Working?
- Conclusion
Default Add to Cart button in WooCommerce
Before getting a deep insight on how to create a WooCommerce custom Add to Cart button for a product, let’s take a look at the default WooCommerce add to cart button.
In the default WooCommerce, except the external/ affiliate products that belong to other sources, an Add to Cart button always appears on all single product pages because they are the places where customers often make purchases.

Besides the single product page, you can see add to cart buttons under the products on the shop page where all products are displayed. Then customers can make a purchase more quickly without landing on the single product page. However, there are different types of products in a WooCommerce store so there may be no Add to Cart button under some products, but other buttons. The texts on the buttons may vary depending on the type of product.
For example, if the product is an external/affiliate product type, the button will be Buy Product From the source it belongs to with the link directly to it. In case, it is a WooCommerce variable product with several variations, the button under it may be the Select Options button for customers to choose from. There are many other product types, but the two types of products mentioned above are the most common cases where the product cannot be purchased directly from the shop page.

Moreover, the Add to Cart button can also be placed in the WooCommerce related products on single product page by default. You can set related products when customizing the WooCommerce product page.

In addition to the positions above, you can also see the Add to Cart button on the category pages, tag pages, or any products filter pages that display a group of products that the customers are looking for.
Where exactly this button will show depends also on the options of your WP theme and on the theme authors. What we want to talk about is how to add an Add to Cart button wherever you want.
Why do you customize WooCommerce Add to Cart button?
Although it works well with the default settings of the WooCommerce Add to Cart button, you can take your store to the next level by customizing it to make the purchase process more user-friendly and simple. Although shorter purchase processes tend to work better, it depends on the type of product you sell. There’s no one size fits all approach.
Some store owners prefer to shorten the purchase process by skipping the Add to Cart step and navigating the clients directly to the checkout page. This method works especially well in the stores selling only one product, or in case the customers would like to purchase a single product in a multi-product store.
On the other hand, the Add to Cart button is extremely useful for stores that sell a lot of products, and when customers want to buy more than one product, or when visitors wish to go through the shop, then adding or removing products from the cart before proceeding to the checkout page.
If you want to create a WooCommerce change add to cart button to make it meet your store’s requirements and the customers’ needs, you can follow some ways below.
How to customize the Add to Cart button in WooCommerce?
There are many different ways that you can apply to add WooCommerce custom Add to Cart button. You can select any options to change the add to cart button to fit your store and products. There will be some methods you need to have certain coding knowledge or need to use a third-party plugin or a WooCommerce theme that support editing the Add to Cart button.
In detail, you will learn how to:
- Change the Add to Cart button text
- Replace add to cart text with icons
- Add text before or after the Add to Cart button in single product page
- Change the color of the Add to Cart button
- Make a sticky Add to Cart button on WooCommerce
- Add a Direct Purchase button along with the Add to Cart button
- Display Add to Cart Buttons Anywhere on Your WordPress Website
- Customize the Added to Cart Messages
Let’s have a look at how to do each of these things step-by-step.
Before doing the following methods, you should generate a child theme or install WooCommerce Code Snippets plugin to your WordPress site. It will help you protect your site from code-related bugs when you add more codes to your site.
Here, I will create a child theme for my site and activate it to start customizing.

1. Change WooCommerce add to cart button text
The second customization option you can make with the Add to cart button is editing the “add to cart” button text. You can change the Add to Cart button text to make it more suitable and work better for your eCommerce store. There are various options for you to change your default WooCommerce shopping cart button text such as “Add to Bag“, “Book a Place“, “Buy Now“, or “Add Product” buttons as per your convenience.
To change the default Add to Cart button text, you can follow the step below.
- Open WordPress admin panel, go to Appearance > Theme Editor
- Open Theme Functions / functions.php file
- Add the following code at the bottom of the function.php file
// To change add to cart text on single product page
add_filter( 'woocommerce_product_single_add_to_cart_text', 'woocommerce_custom_single_add_to_cart_text' );
function woocommerce_custom_single_add_to_cart_text() {
    return __( 'Add To Bag', 'woocommerce' );
}

// To change add to cart text on product archives(Collection) page
add_filter( 'woocommerce_product_add_to_cart_text', 'woocommerce_custom_product_add_to_cart_text' );
function woocommerce_custom_product_add_to_cart_text() {
    return __( 'Add To Bag', 'woocommerce' );
}
As you can see, this code is for single products and collection page. It will let you change the text to “Add to Bag“, however, you can turn it to any other custom texts you wish by replacing all of the “Add To Bag” phrases in the code with your desired texts.
- Click the Update File button to save the changes and go to the frontend to check how your WooCommerce add to cart button custom text is shown on your store.

This is the result of the change in the single product page.

And this is how it looks on the collection page.

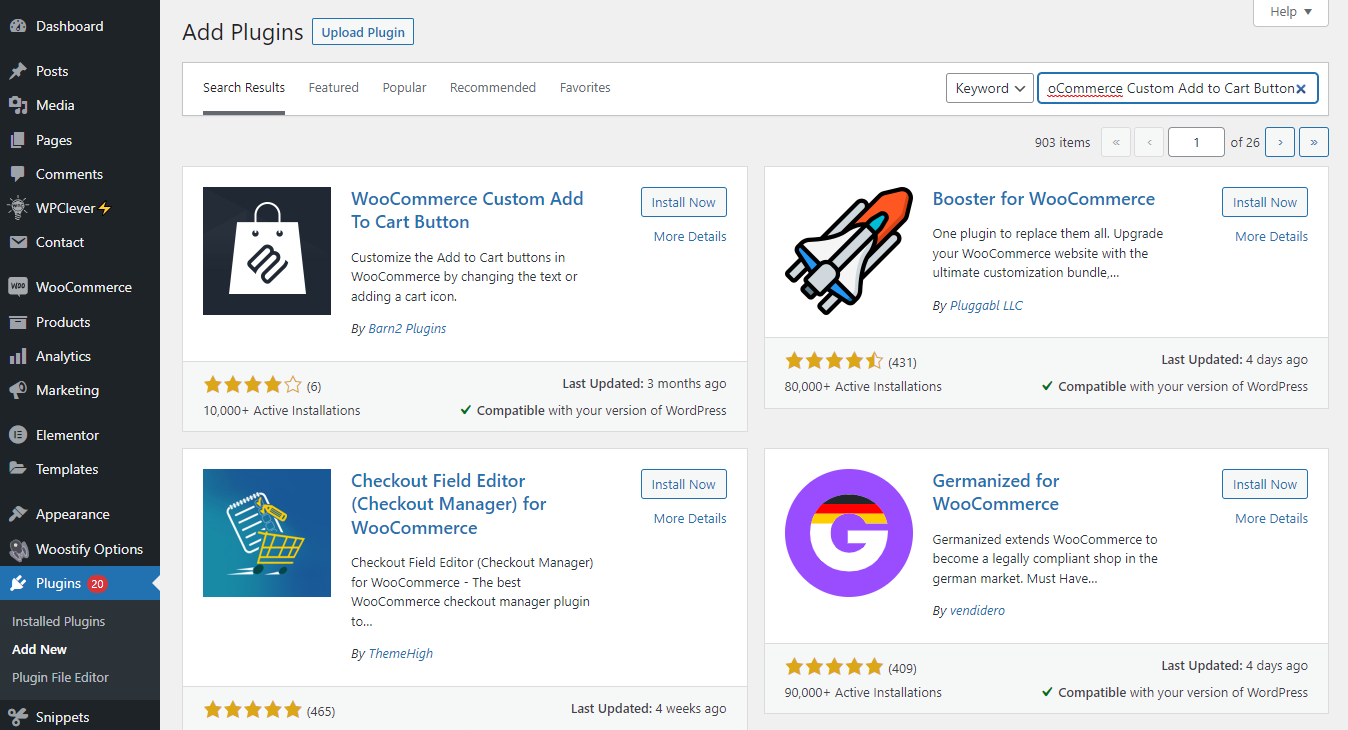
2. Replace WooCommerce Add to Cart Text with Icons
You can use the free WooCommerce Custom Add to Cart Button plugin to replace the “add to cart” text from the buttons with cart icons.
This is especially useful for quick, single-page order forms, where you have an “add to cart” button for each product and want to save space. In this case, you should display cart icons instead of “add to cart” text.

It is pretty straightforward. Just follow the instructions below:
- Install and activate the WooCommerce Custom Add to Cart Button plugin on your WordPress website.
2. Navigate to Appearance > Customizer > WooCommerce > Add to Cart from the WordPress dashboard.
3. Tick the Show add to cart icon box.

4. Tick the Hide the add to cart text box.
5. Finally, click on the Publish button.
3. Add text before/after the Add to Cart button on single product page
The third way you can do to customize the Add to Cart button in WooCommerce is to add a text before or after the Add to Cart button on the single product pages.
Add text before the Add to Cart button
Normally, there will be a product short description above the Add to Cart button. However, you can mention a notice, a guarantee, free shipping, or a return policy, etc. before the Add to Cart option.
For example, you can add the text “Free Shipping“ by using the echo statement.
add_filter( 'woocommerce_loop_add_to_cart_link', 'woostify_before_after_btn', 10, 3 );
 add_action( 'woocommerce_before_add_to_cart_button', 'woostify_before_add_to_cart_btn' );
 function woostify_before_add_to_cart_btn(){
     echo 'Free Shipping';
 }
Copy the code above and past it into the functions.php file of the file theme, then click Update File to save everything.

Go to the product page to see how the text is displayed.

Add text after the Add to Cart button
You can also add custom text after the Add to Cart button. This can be useful to notify clients that there might be discounts for bulk purchases. In the example below, I will include the text Contact us for bulk purchase under the Add to Cart button by adding this code snippet at the bottom of your child theme’s function.php file:
add_action( 'woocommerce_after_add_to_cart_button', 'content_after_addtocart_button_func' );
 function content_after_addtocart_button_func() {
 // Echo content.
 echo '
(*Contact us for bulk purchase)
';
 }
Copy and paste this code to the file and then save it.

You can check the result after you update the file:

With both 2 methods before, you can change the text by adding other custom content in the code.
4. Change WooCommerce Add to Cart button color
Another way to customize the Add to Cart button is to change its color. Even though most WooCommerce themes offer default colors for all types of buttons throughout the website, you should make sure that they match your store’s design and change WooCommerce Add to Cart button color to make it stand out.
When editing the WooCommerce Add to Cart button color, you will need to add a CSS code snippet to your theme’s stylesheet (mostly known as the style.css file). You can access it by going to Appearance > Customize:

Then you are navigated to a new window with a list of options. Here, you can have 3 ways to change the color of Add to Cart button.
Change WooCommerce Add to Cart button color throughout your site
The first way is clicking in Buttons > Background Color.

Here, you can customize change the background color and text color of your Add to Cart button. But with this option, you will change the color of all buttons on all pages.

Change WooCommerce Add to Cart button color differently in different pages
Select WooCommerce to customize the Add to Cart button on shop pages separately.

Then navigate to Shop Archive/ Product Single

With the Shop Archive option, you can not only change the color background and text but also customize the position of the Add to Cart button displayed on WooCommerce shop archive pages.

On the Single product page, you can also change the color of Add to Cart button’s background and text and the hover effect.

Change WooCommerce Add to Cart button color using CSS code
The third way to edit the color of Add to Cart button is by clicking in Additional CSS to add custom code to change WooCommerce Add to Cart button color.

This is the color of the button before I make changes.

Copy the code below and paste it in the Additional CSS or in the style.css file and change the colors to the ones you want.
/* "Add to cart" button on single product page */
.single-product .product .single_add_to_cart_button.button {
    background-color: #0c7815;
    color: #FFFFFF;
}
/* "Add to cart" button on archives (e.g. shop, category page) */
.woocommerce .product .add_to_cart_button.button {
    background-color: #0c7815;
    color: #FFFFFF;
}
In this case, we will change the WooCommerce Add to Cart button color on the single product pages and archive pages into a green background and white text. You can select other colors by changing the HEX code color in the code above.
How to get the HEX codes? The quickest way to get the exact HEX color code is to go to Google and search for the Color picker. Then drag the sliders (the round buttons) to select the color you want to use. Copy the code starts with # under HEX. That’s the color code we need for the CSS rule.

Here is how the color of the background and text change in the new Add to Cart button on the category page.

This is how it looks on the single product page.

5. Make sticky Add to Cart button on WooCommerce
The Sticky Add to Cart button is a floating Add to Cart button and always sticks at the bottom or top of a single product page when the visitors scroll down the page. It will enable the customers to easily add the products they want to their shopping cart immediately without scrolling up to the Buy Now or Add to Cart button above, which may result in a better shopping experience and higher conversion rate.
In this section, we will show you how to create a WooCommerce sticky Add to Cart button with Woostify theme.
To make a sticky Add to Cart button, you need to Install and Activate the pro version of Woostify theme with the price starting at $49. After activating the theme, you can follow this tutorial to enable WooCommerce Add to Cart button to stick on your product page.
6. Add a Direct Purchase button along with the Add to Cart button
As I said before, the more simple the purchase process is, the better conversion rate you will get. So if it is possible, you should include the Add to Cart button with a purchase button.
There is many ways for you to do that. The easiest and most simple one is by using Woostify theme.
In Woostify theme, you can enable both Add to Cart button and Buy Now button. So that, your customers not only can go through your online shop but also buy the items you want and directly navigating to checkout. After installing and activating the theme, you can easily turn on Buy Now buttons by referring to this tutorial.
7. Display Add to Cart Buttons Anywhere on Your WordPress Website
WooCommerce comes with a built-in [add_to_cart] shortcode for you to insert an add to cart button for a particular product anywhere on your online store. You just need to add the ID and/or SKU of the product you want to display the add to cart button for. For example:

In addition, you can include the product price: [add_to_cart=”96″ show_price”=”true”]
For simple products, it will show an add to cart button. But a “Select option” button will be shown for variable products.

8. Customize the Added to Cart Messages
In addition to customizing the add to cart button, you can also edit the added to cart message. The easiest way to customize it is by pasting the following script in the “functions.php” file.
add_filter( 'wc_add_to_cart_message_html', 'woostify_custom_add_to_cart_message' );
function woositfy_custom_add_to_cart_message() {
   $message = 'The item has been added to cart. Thanks for shopping with us!' ;
   return $message;
}
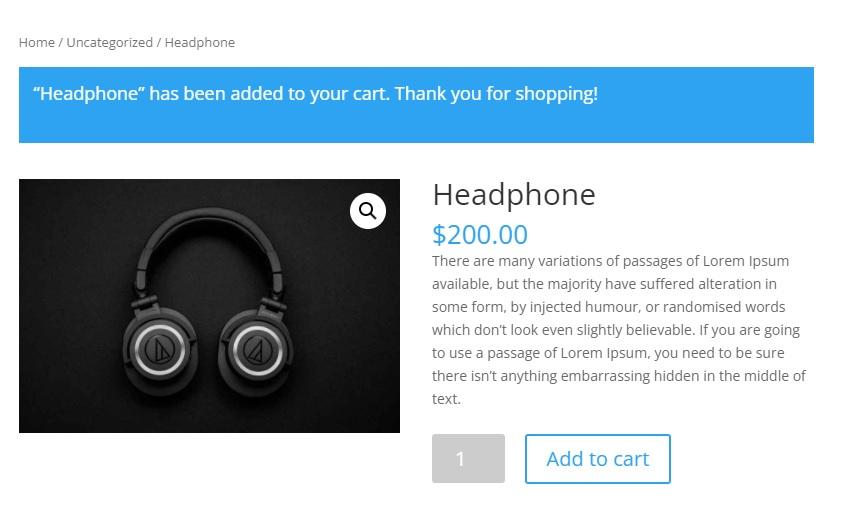
In this case, we are changing the message to “The item has been added to your cart. Thanks for shopping with us!”
To make it personalized, you can display the product name as follows:
add_filter( 'wc_add_to_cart_message', 'woostify_custom_wc_add_to_cart_message', 10, 2 );

function woostify_custom_wc_add_to_cart_message( $message, $product_id ) {
    $message = sprintf(esc_html__('%s has been added to your cart. Thank you for shopping!','tm-organik'), get_the_title( $product_id ) );
    return $message;
By adding the above script, your customers will see something like this:
Alternatively, you can remove the added to cart message entirely. All you need to do is add the following script:
add_filter( 'wc_add_to_cart_message_html', '__return_null' );How to Fix WooCommerce Add to Cart Button Not Working?
Above are some ways for you to make WooCommerce change Add to Cart button to make it more helpful. In some case, there are some reasons make the WooCommerce Add to Cart button not working on your store such as:
- A Theme or Plugin conflict
- Server issues
- Code issues
Here are the steps to fix Add to Cart Button missing in WooCommerce:
Enter Complete Product Information in WooCommerce
The add to cart button is only visible when you provide all the necessary information about a product.
If a product is fully recognized as a finished and presented product by the site, the Add to Cart button will not be displayed for it. To fix this issue, you need to make sure you fill up all required product information such as weight, description, dimensions, product ID, prices, and SKU. Check all things carefully and make sure you don’t leave any required fields blank. Once the information is added, the add to cart button will appear.
Check WooCommerce Compatibility with Other Plugins
WooCommerce may face many errors when plugins conflict with each other. You must be using plugins or codes, not all of which are compatible with WooCommerce. This is the most common and easiest to test and resolve problem.
In such cases, you need to disable all plugins, then re-enable your plugins one by one until you find the plugin causing the issue. By removing the failed plugin, the WooCommerce Add to Cart button will be enabled on your site.
Fix Code-Related Issues
There may be some issues with the default coding section of WordPress. By default, if you set the same price for different variables of a product, WooCommerce hides the price and the Add to Cart button for this product and other products without a variable.
If you are experiencing this issue, copy and paste the following code in the PHP function:
add_filter('woocommerce_show_variation_price’, function() { return TRUE;});
By doing so, the WooCommerce Add to Cart button missing issue should be resolved.

Server-Side Issues (mod_security)
Another issue that indirectly causes WooCommerce Add to Cart button missing is the inability to read the jQuery code. This issue happens when the server’s mod_security of your site has expired and uses the old rules.
To check this case, go to your browsers developer’s tool (Chrome Developer’s tool, for example) and see if the JS error appears or not: “.jQuery.cookie.min.js is not found”
In case, you experience the error above, contact your hosting provider immediately to check it for you.
Fix Theme Related Issues
There are some reasons for WooCommerce Add to Cart button not working on your shop pages caused by certain WooComerce themes. Below are some of the easiest ways to fixed such problems.
1. Restore to Previous Theme Versions or Update it
The first way you can try is to use the older version of the theme or update it. Changing the theme completely could fix the Add to Cart button missing in the WooCommerce store.
2. Change the theme’s code
In case you didn’t succeed with the first way, you can follow the steps below to fix your issue.
In your WordPress dashboard, go to Appearance > Theme Editor of the main theme (not the child theme as we do in the sections above) on the right-hand side of WordPress, find the Index.php file (Main Index Template) or Single.php file (Single Post) (Files’ names may be different in different themes):

If you see an index.php file, click on it. Otherwise, click on the single.php file. In both files, scroll down until you see the get_template_part line.
Now copy that line and replace it with the following code:
if ( is_singular( 'product' ) ) { wc_get_template_part( 'content', 'single-product' ); } else { //paste the line you copied here (replace the whole line, including //) }
Make sure to paste the line of code you copied in the second block. After adding, it would look like this:
if ( is_singular( 'product' ) ) { wc_get_template_part( 'content', 'single-product' ); } else { get_template_part( 'template-parts/single' );}
Finally, click the Update File button to save the file and then return to the shop pages to check if the Add to Cart button appears.
3. Switch to another WooCommerce theme
If you did try the 2 ways above, the issue has not resolved. You can think of change your theme. There are various WordPress themes out there but not all of them support WooCommerce. If your theme doesn’t support WooCommerce, the Add to Cart button may not work on your site.
If you are experiencing this situation, you should switch to another theme that is for WooCommerce. We highly recommend you use the Woostify theme. This is a powerful theme completely focusing on WooCommerce, which can remove all unexpected issues causing Add to Cart button missing on your WooCommerce store. As mentioned earlier, Woostify allows you to enable and create WooCommerce custom Add to Cart buttons with simple clicks and almost no line of codes.

Conclusion
There are different methods to customize WooCommerce Add to Cart button, most of which involve adding code to your theme’s file. To make changes with these ways, you need to have programming knowledge. Although, it is easy to do those steps, one difficulty you may get is your customizations can be lost with a theme update.
From that, you should go for the more simple way which is using the Woostify theme. It offers default settings to enable Add to Cart button in your WooCommerce store and provides you with advanced customization options for it. Moreover, this theme is 100% built for WooCommerce, so that it will remove all theme-related issues.
Hopefully, from this article, you will find out the most suitable methods to create WooCommerce change Add to Cart button on your site. If you have further questions or recommendations, please let us know by leaving a comment below.
What a wonderful post! Very insightful and helpful. I am looking for a way to change our ‘add to cart’ buttons. Our website is in Dutch and the standard translation is a bit of a struggle, as it is a longer subject (‘Toevoegen aan winkelwagen’) inside the button than I would prefer. That’s why I found this blog. I tried the first method and inserted the code. It works wonderful throughout the site. Only thing is; the variation products change as well when the code is applied. You did a wonderful job describing the differences, where standard the ‘select options’… Read more »