
Callback addon in Woostify displays the email subscription form on the product page when the product is out of stock. Or you can use this form to in-stock products based on the category.
After receiving the subscriber list, you can manage subscribers in one place and notify them by sending an email in a background process. You can also export the subscribers to other email marketing platforms like Mailchimp to send bulk emails.
Support product types:
- Simple
- Variable
In order to enable the Call Back function in Woostify, please follow the guide below.
Step 1: Enable the Woostify Call Back feature by navigating to the Woostify Options in the left menu, then scrolling down to Call Back and clicking the Active text link.

After that, you should hit the Settings text link to go to the settings page.

Step 2: Make necessary customizations
There will be 5 sections for you to set up, including Frontend Form, Messages, Style, Products, and Mail.
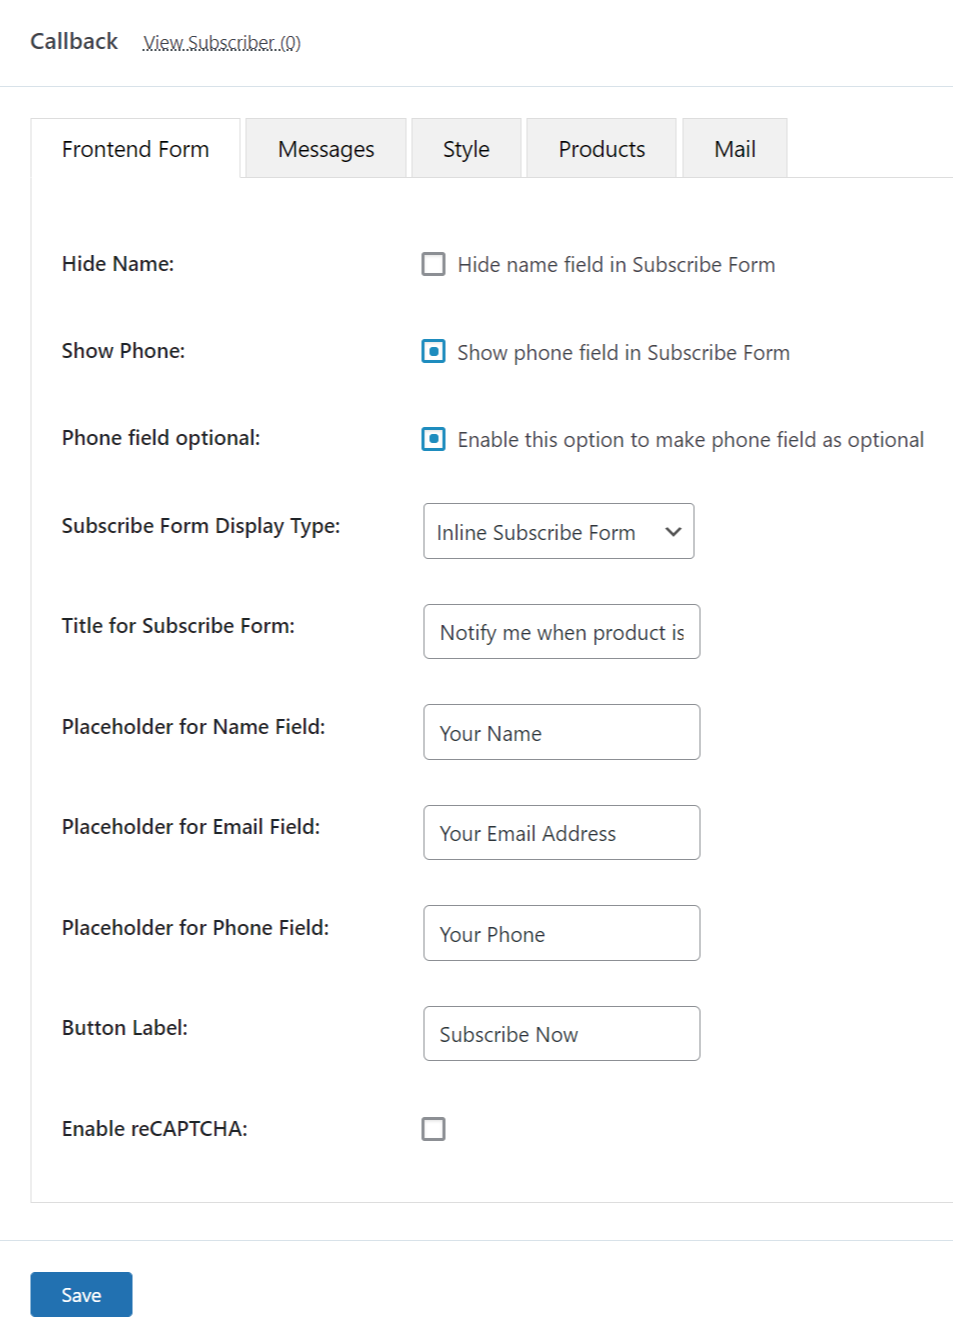
In the Frontend Form tab, you can set up and edit the following information:
- Hide Name
- Show Phone
- Phone Field Optional
- Subscribe Form Display Type
- Title for Subscribe Form
- Placeholder for Name Field
- Placeholder for Email Field
- Placeholder for Phone Field
- Button Label
- Enable reCAPTCHA
In the Message section, you can change:
- Messages validate field name
- Messages validate field email
- Messages validate is not email
- Messages validate already subscribed
- Messages validate field phone
- Messages success
- Messages reCAPTCHA
- Messages Validate reCAPTCHA
In the Style area, you can make changes with:
- Form that includes Border Radius, and Border Color
- Form Title that includes Color, Background Color, Font Size, and Font Weight
- Form Button Submit and Button Popup Form that includes Color, Color Hover, Background Color, Background Color Hover, Width, and Height
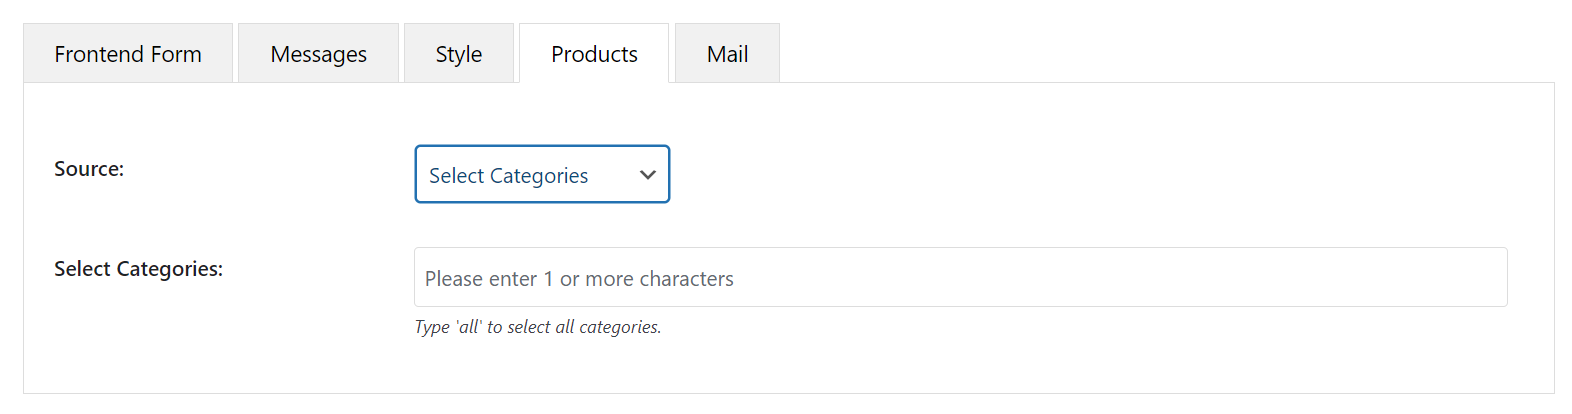
In the Product section, you can select the source of products from the dropdown button. There are 3 options to choose from: All products, Out of stock products, and Select Categories
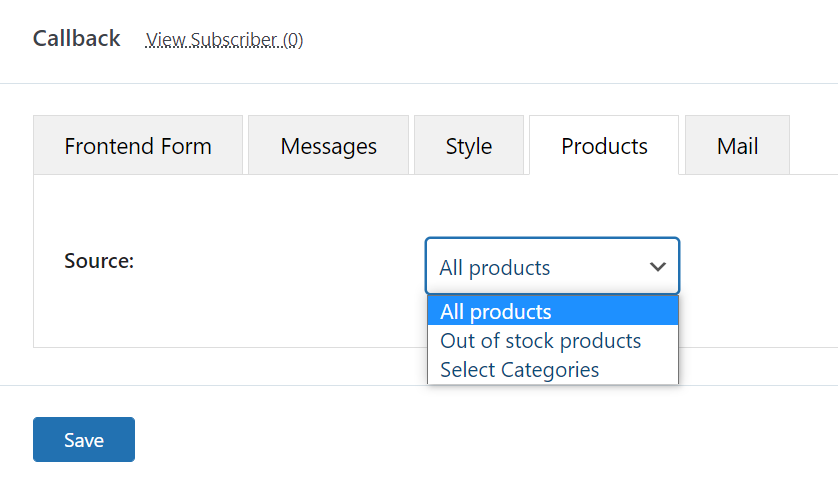
If you select the option Select Categories, then you need to narrow down and choose the products that will display the form
- By categories
- for all products
- for out-stock products
In the Mail tab, you can customize the following information:
- Subscription Mail Send that includes Subscription Mail Subject, Subscription Mail Message
- In-stock Mail Send that includes Instock Mail Subject and Instock Mail Message
Enable the Checkbox for the form:
In Frontend form tab, enable the checkbox option and edit the text field to require the users to accept the terms before submitting the form

To send emails to users automatically when products are back in stock, enable the Instock mail send option in the Mail tab

Once finished, make sure to click the Save button to update your changes.
Here is how it works:

Manage subscribers: the admin can edit, send an email, and import/export the list
