
Allowing customers to place pre-orders in your store, and ensuring that they receive their new item as soon as it becomes available, are terrific ways to gain new customers or engage existing ones. That is why we designed the Woostify pre-order addon which covers all bases.
With Woostify pre-order addon, you can:
1-click enable the pre-order addon
To use this addon, you need to download and install Woostify pro version.
From your WooCommerce dashboard, click Woostify Option in the left sidebar menu. Then, you find Pre-Order from the list of premium addons of Woostify.
Just hit the Activate button, and finish.

Now, you have already activated Woostify Pre-Order in your WooCommerce store.
Let’s move down to do other settings and customization to make it fit your store.
Easily Set up & customize pre-order
In this section, you will learn how to set up Pre-Order function in your store.
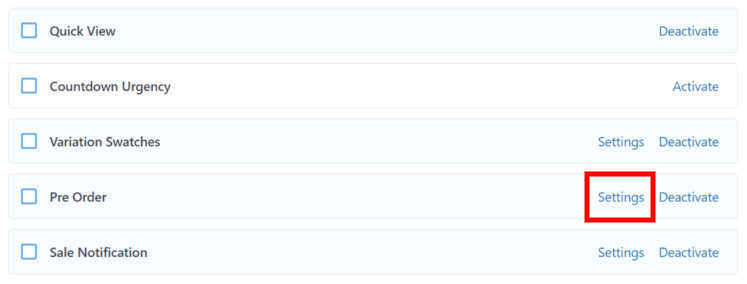
Once you activate this feature, press the Setting link to navigate to the Pre-Order setting page.
There are 3 sections for you to set up and custom, namely General, Message, Style.
General

In this part, you can set and custom the following elements:
- Pre-Order Label: The text appears on the pre-order product’s image
- Pre-Order Closed: This text will be shown when the Pre-Order ends
- Countdown: Enable/ Disable the countdown timer for the available products.
- Countdown Label: The text appears on the countdown timer
- Label: The time that customer can place the pre-order.
Message
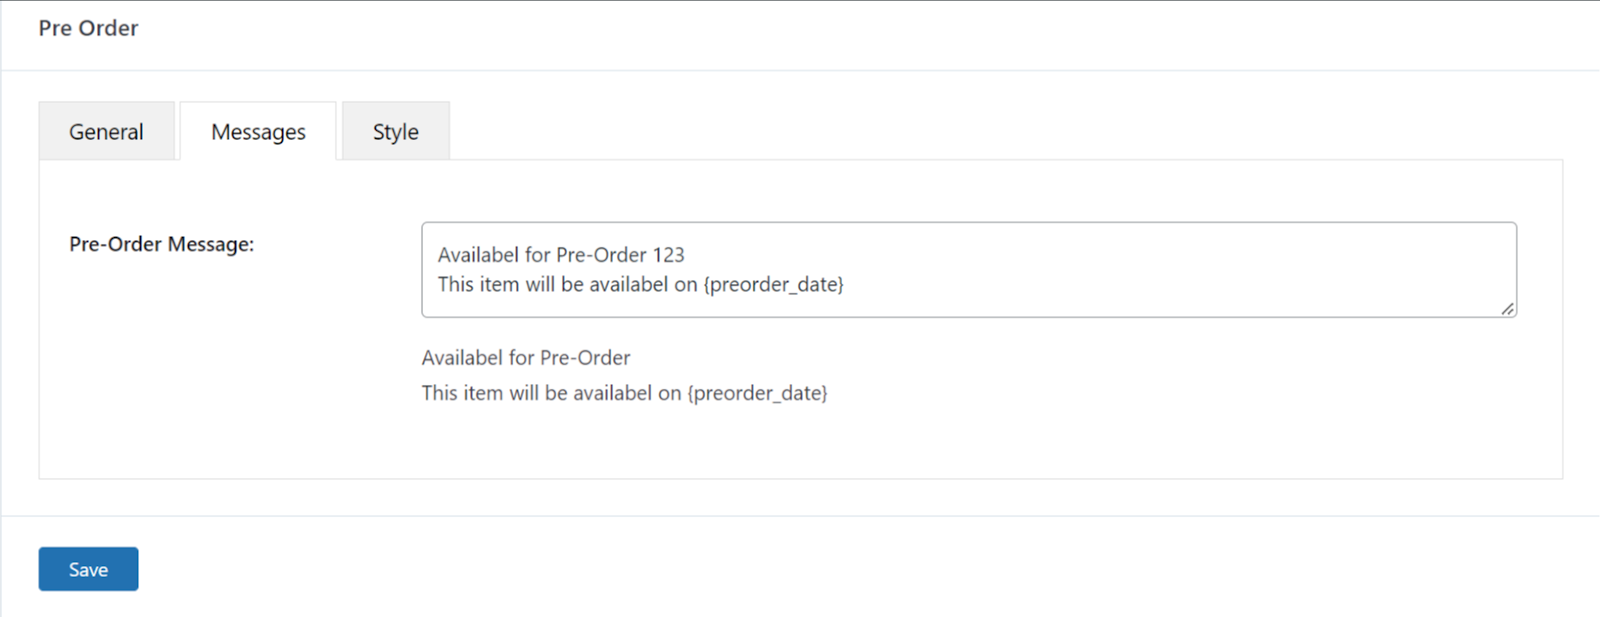
In this area, you can set and edit the Pre-Order Message. On the front-end, this message will be shown right above the Place Order button.
Style
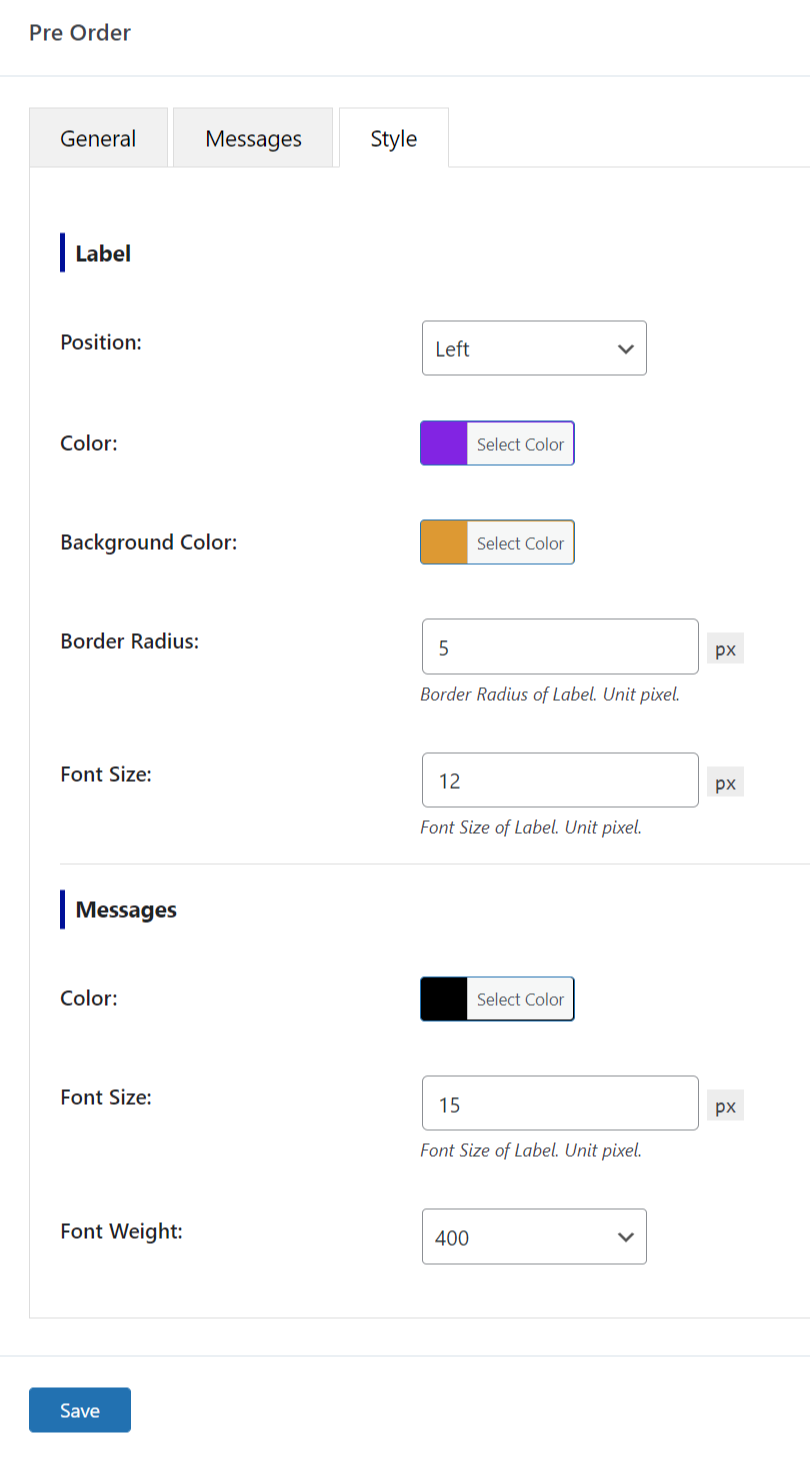
In the Style section, you can customize Label and Message:
Label
Here, there are 4 parts you can make changes, including:
- Position
- Color
- Background color
- Border radius
- Font size
Message
In this section, you can edit:
- Color
- Font size
- Font weight
Apply Pre-Order for products individually
Once you finish setting up the pre-order function in your store, it’s time to implement it in your products.
First, you need to create a single product page to display that product. This process is simple, like the way you do for a normal product.
Then, you need to visit that page and do the required steps below:
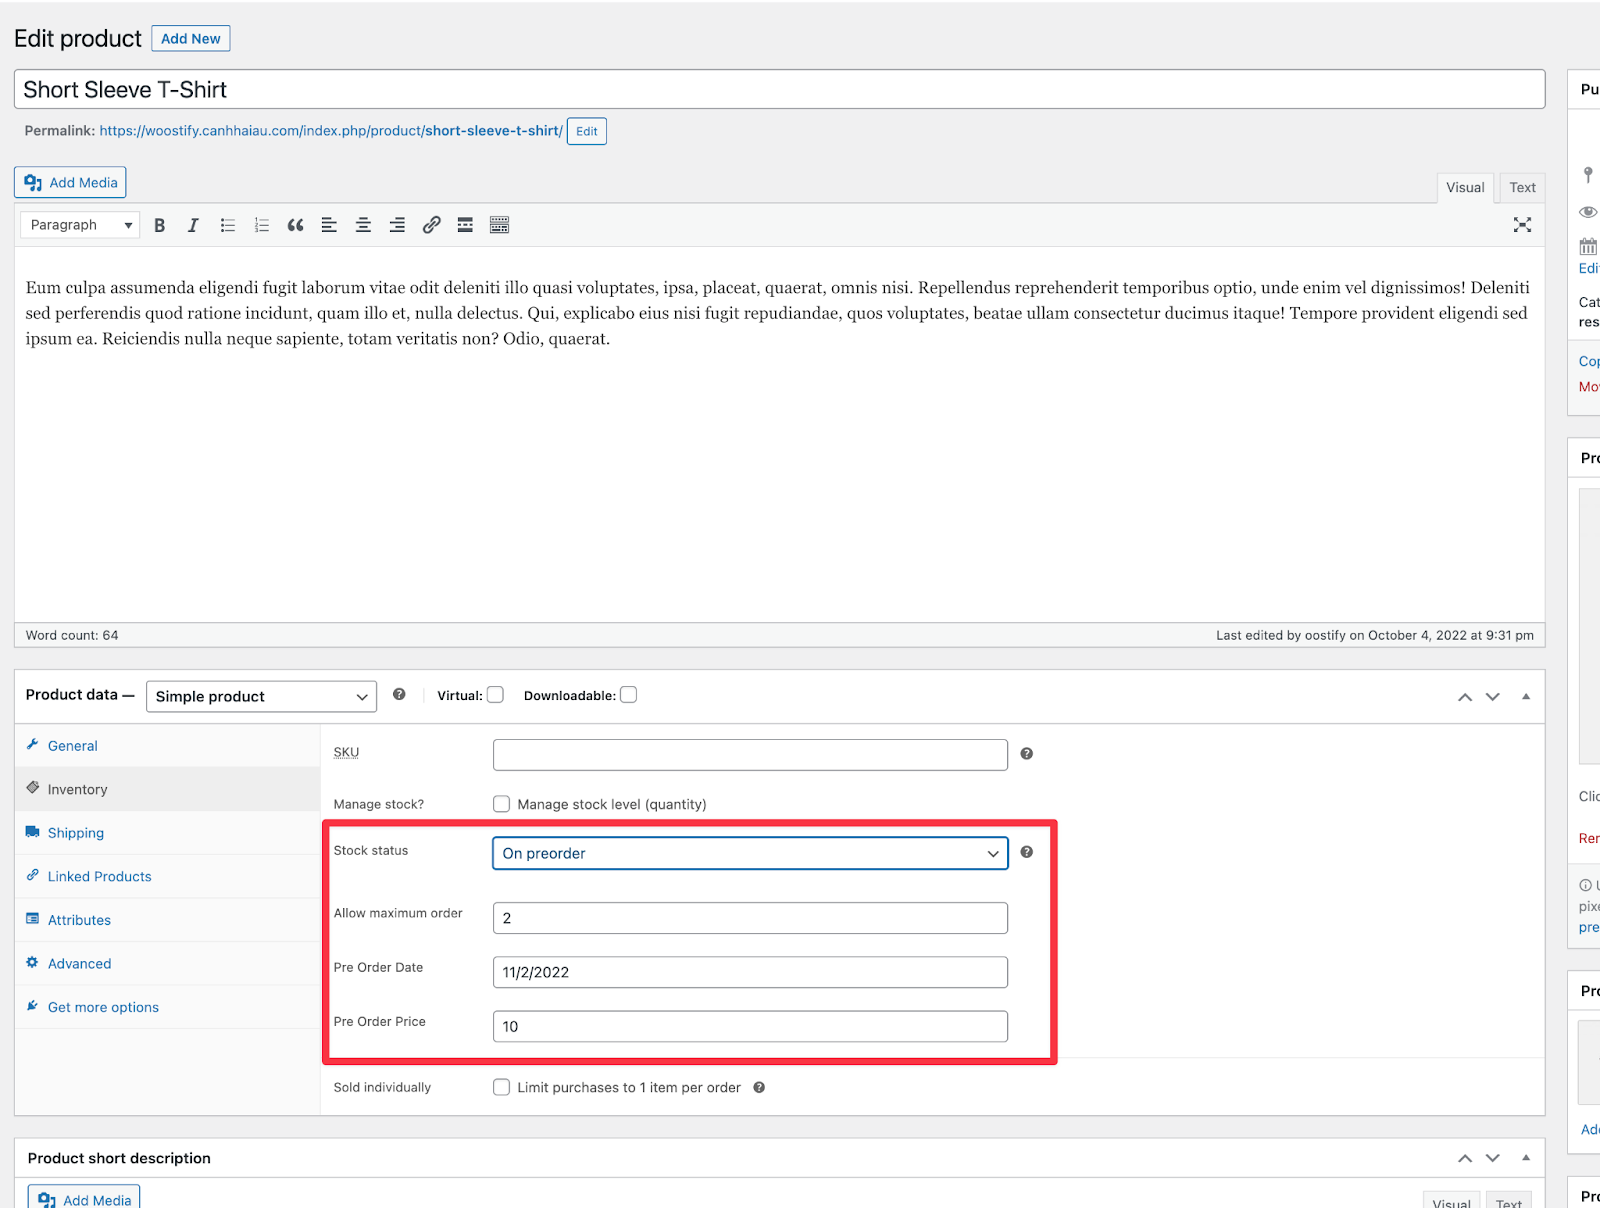
- Scroll down to the Product data section, choose Single Product in the dropdown menu
- Navigate to Inventory to set the product pre-order information, including:
– Stock Status: On Pre-order
– Allow minimum order: the minimum quantity of pre-order items.
– Pre-order date: The date that pre-order ends.
– Pre-order price: The price for each one pre-order item. (This normally lower than the price when the products are available).
- When finishing all things, click Save/ Update button
Finally, you should visit the pre-order product page to see if it looks as good as you expect.
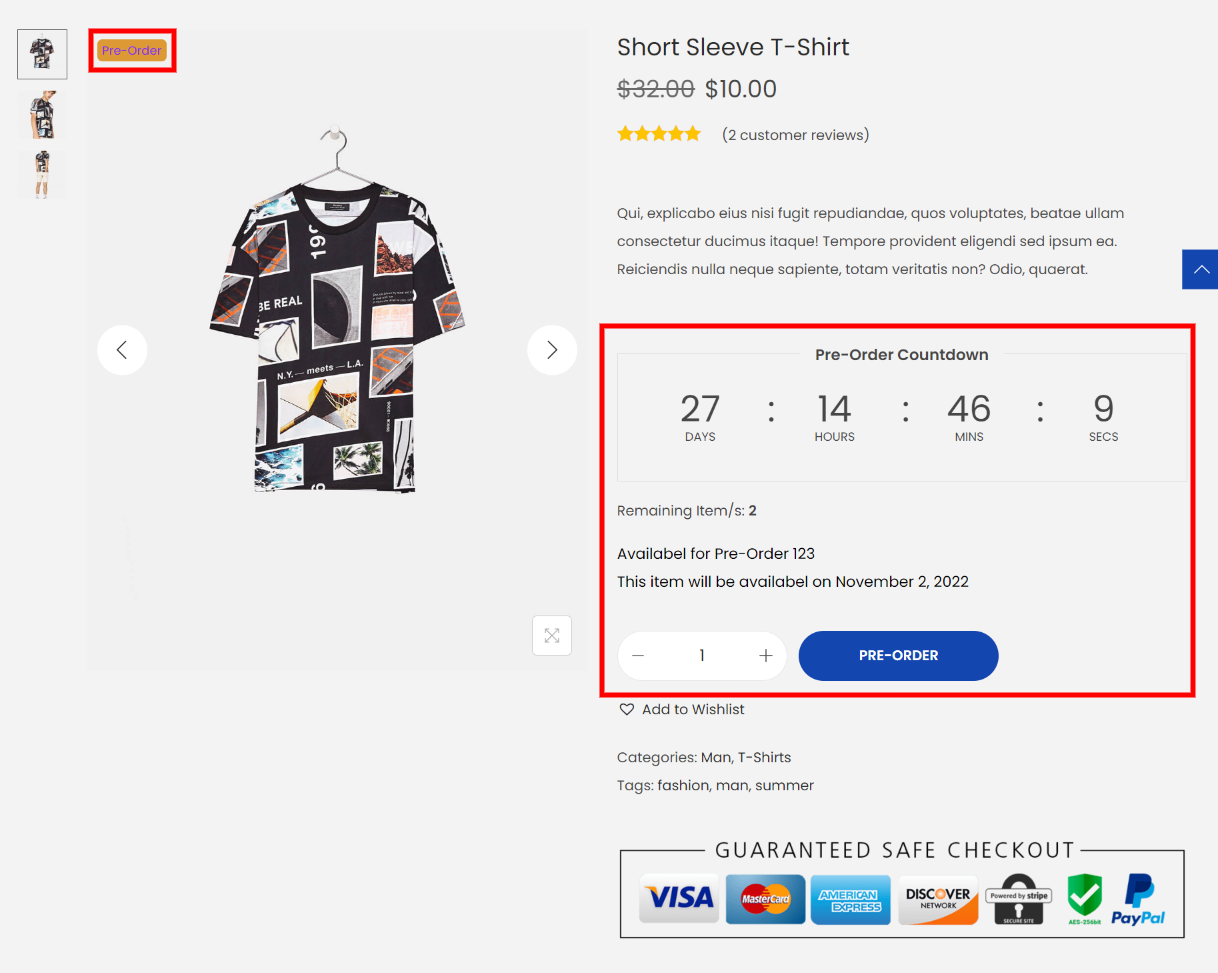
On the Shop page, the pre-order products display different labels and message
